- How to Flush DNS Cache in Linux
- Flush DNS Cache in Linux in 2020
- Checking if DNS Caching is Enabled
- Flush DNS Cache in Ubuntu
- Flush DNS Cache in DNS Services on Linux
- Flush nscd DNS Cache
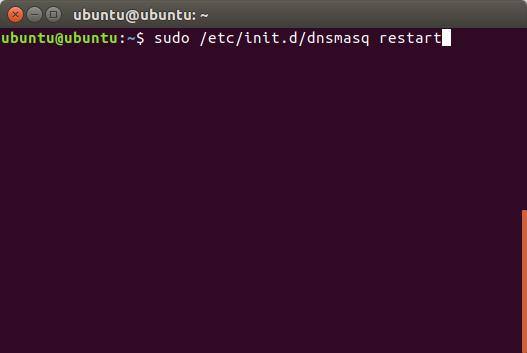
- Flush dnsmasq DNS Cache
- Flush BIND DNS Cache
- Bonus: Change DNS Settings in Ubuntu
- Change DNS Settings using the GUI
- Change DNS Settings using the Terminal
- Clear DNS Cache in Linux Using These Methods
- Как очистить / сбросить кеш DNS в Linux
- 1) Очистить кеш DNS на Ubuntu / Debian / LinuxMint
- 2) Сброс кеша dns сервера BIND
- 3) Очистить кэш nscd DNS
- 4) Очистить dnsmasq dns кэш
- 5) Очистка кеша dns в Windows
- 🌐 Как очистить или стереть кеш DNS на Linux
- Зачем очищать или удалять кеш DNS?
- Как очистить кеш DNS в Linux
- 1. Служба кэширования DNS Systemd-resolve.
- 2. Служба кеширования DNS Nscd.
- 3. Служба кэширования Bind / Named DNS.
- How To Clear Or Flush DNS Cache In Linux
- Why should you clear or flush DNS cache?
- Clear Or Flush DNS Cache In Linux
- 1. Clear Systemd-resolve DNS caching service
- 2. Clear Nscd DNS caching service
- 3. Clear Bind/Named DNS caching service
- 4. Clear Dnsmasq DNS caching service
How to Flush DNS Cache in Linux
DNS, or a Domain Name System, is responsible for resolving website names into their respective IP addresses. There are multiple DNS servers and you can pick and choose the one you want to use. So, if you’re having trouble connecting to a website, or if you just want a DNS change to be seen by your Ubuntu machine, you should try to flush the DNS cache. You can also clear DNS cache in Ubuntu if you made changes to the hosts file, and you want it to be “seen” by your system without having to reboot it. Well, if you’re in any of these situations, and you want to clear DNS cache, here is how to flush DNS cache in Linux.
Note : I’m using an Ubuntu 16.10 “Yakkety Yak” system to demonstrate these methods. However, the process should be similar on most Linux distros.
Flush DNS Cache in Linux in 2020
Before we get to our tutorial, let’s see first if DNS caching is enabled on your machine or not.
Checking if DNS Caching is Enabled
All Linux distros do not behave the same way, when it comes to things like caching DNS. For example, Ubuntu, by default, doesn’t cache DNS. Before we try to clear DNS cache on a Linux machine, let’s check if caching is even enabled. To do this on an Ubuntu system, you can follow the steps below:
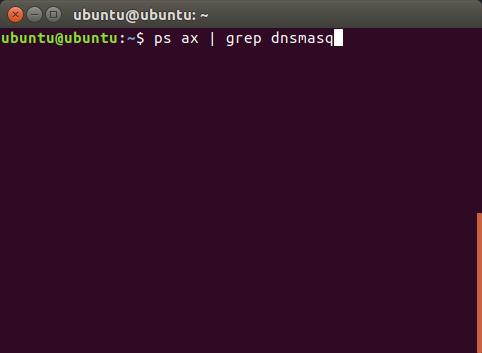
1. Launch Terminal, and type “ps ax | grep dnsmasq“.
2. In the output from the command, you will be able to see a field called “cache-size“. Check its value. If the value is zero, it means that caching is disabled on the system.
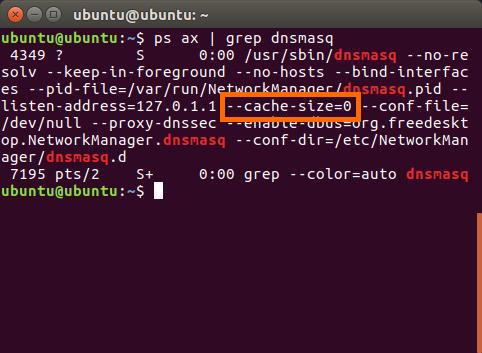
Note : If you want to enable DNS caching on Linux, you can do so by using the command “sudo dnsmasq -c 150”. You can use any number in place of 150, which is basically the number of entries that dnsmasq can cache.
Flush DNS Cache in Ubuntu
If your Linux system is caching DNS entries, then you can try to flush the DNS cache in order to get rid of any DNS related problems. To clear DNS cache in Ubuntu, you can follow the steps below:
1. Launch Terminal (ctrl + alt + T), and type “sudo /etc/init.d/dns-clean restart“.
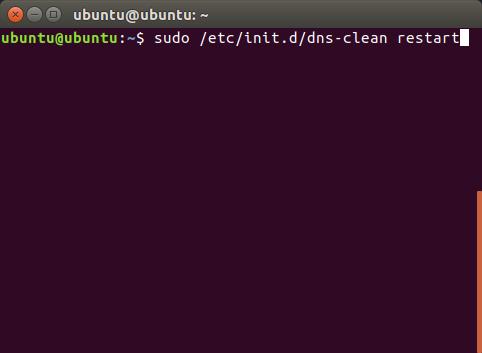
2. Next, type the command “sudo /etc/init.d/networking force-reload”
![]()
This will clear your DNS cache in Ubuntu, and if the problems you were experiencing were due to DNS issues, they should now be gone.
Flush DNS Cache in DNS Services on Linux
Like I said, Ubuntu doesn’t cache DNS entries by default, however, if you have manually installed a DNS service such as nscd, you can clear its cache. Methods to clear cache for some common DNS services are given below:
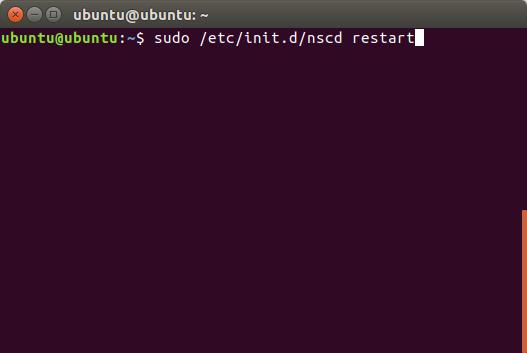
Flush nscd DNS Cache
Flush dnsmasq DNS Cache
Flush BIND DNS Cache
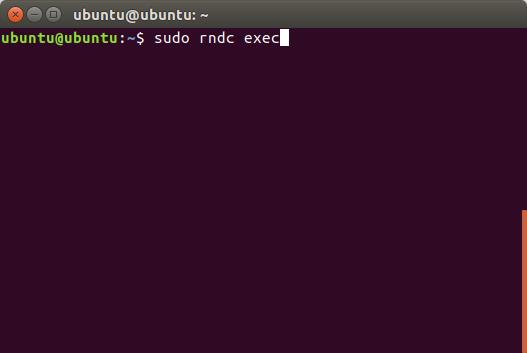
If you’re using BIND, you can clear DNS cache by using one of the following commands:
- sudo /etc/init.d/named restart


- sudo rndc exec
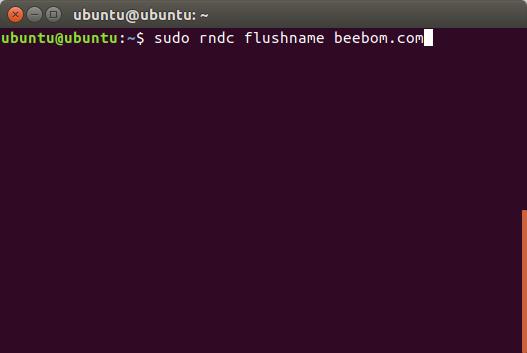
BIND version 9.3.0, and greater, support flushing DNS cache for a particular domain, as well as for the LAN, or the WAN. You can use the following commands to make use of this feature:
- To clear DNS cache for a particular domain, use “sudo rndc flushname beebom.com“
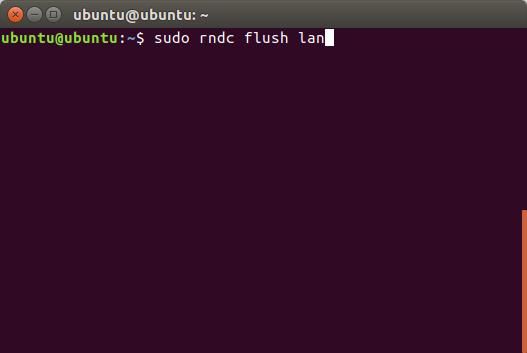
- To clear DNS cache for LAN, use “sudo rndc flush lan“
- To clear DNS cache for WAN, use “sudo rndc flush wan“

Bonus: Change DNS Settings in Ubuntu
We’ve been talking about flushing the DNS cache in Ubuntu, however, there may be cases where you just want to make a change to the DNS settings in Ubuntu. If you want to change the DNS settings in Ubuntu, you can do that using the GUI, or via the Terminal.
Change DNS Settings using the GUI
Using the GUI to change DNS settings is easier than using the Terminal. However, if you use multiple connections, you will have to change the DNS setting for each one of them. To change DNS settings using the GUI, just follow the steps below:
1. Open System Settings, and click on Network.
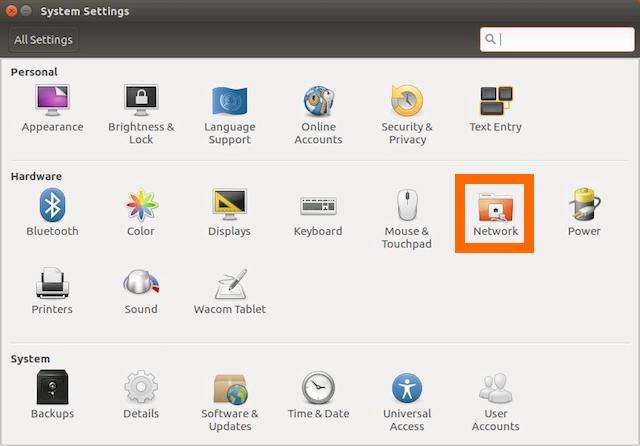
2. Click on the arrow next to the name of the network you’re connected to.
![]()
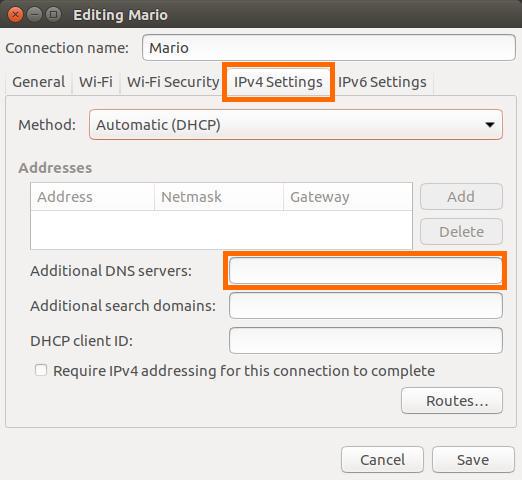
3. Now, click on “Settings”. This will open up the settings for that connection.

4. Switch over to the IPv4 tab, and you’ll see an option called “Additional DNS Servers“. You can enter the DNS servers you want to use in this field. If you want to enter more than one DNS server, just separate them with commas.
Change DNS Settings using the Terminal
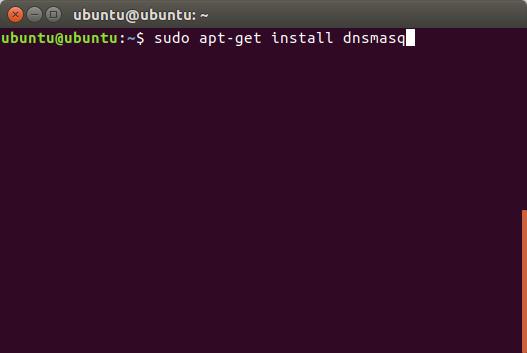
If you don’t want to use the GUI, and prefer changing DNS settings using the Terminal, you can do this by adding the nameservers to the dnsmasq config file. However, dnsmasq does not come installed by default in Ubuntu systems (dnsmasq-base, does). So, first you’ll have to install dnsmasq by launching a Terminal, and using “sudo apt-get install dnsmasq“.
- Once you have installed dnsmasq. You can edit the config file with “sudo nano /etc/dnsmasq.conf“.
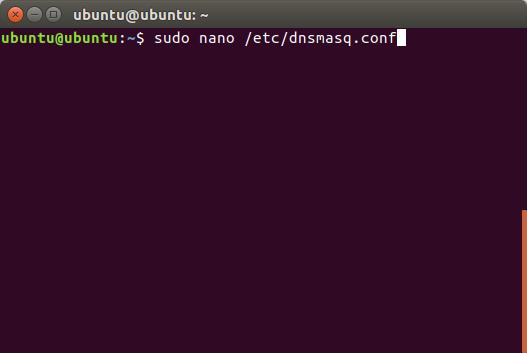
- Here, you can add your DNS servers’ IP addresses where it says “Add other nameservers here“.

Clear DNS Cache in Linux Using These Methods
You can use any of these methods to clear DNS cache in a Linux system. Issues with DNS cache can cause problems such as a webpage not loading, nameserver changes not being recognized by your system, and a lot more. Once you flush DNS cache, these problems will most likely go away. So, have you ever had to flush the DNS cache on your Linux system? If so, what method did you use? If you know of any other method to clear the DNS cache on your Linux system, do let us know in the comments section below.
Источник
Как очистить / сбросить кеш DNS в Linux

В некоторых случаях вам трудно добраться до некоторых сайтов из-за проблемы с DNS, возможно, ваш локальный DNS-кеш поврежден.
Для такой ситуации вам необходимо перезапустить службу кэширования DNS операционной системы.
Кэш-память DNS для системы доменных имен – это временная база данных, которая поддерживается операционной системой компьютера, которая содержит IP-адрес сайтов, которые вы недавно просматривали.
См. Ниже список основных серверов кэширования DNS, используемых в дистрибутиве Linux.
- nscd DNS cache
- dnsmasq dns cache
- BIND server dns cache
nscd DNS Cache: nscd – демон кэша службы имен, Nscd – это демон, который обеспечивает кэш для наиболее распространенных запросов службы имен.
Файл конфигурации по умолчанию, /etc/nscd.conf
dnsmasq DNS Cache: Dnsmasq – легкий, небольшой в размере, простой в настройке, DNS-сервер и DHCP-сервер.
Он предназначен для предоставления DNS и опционально DHCP для небольшой сети и подходит для маршрутизаторов с ограниченным доступом и брандмауэров.
Он может обслуживать имена локальных машин, которые не входят в глобальный DNS.
Он предназначен для использования в персональных компьютерах и небольших сетях, а не для больших сетей.
BIND Server DNS Cache: BIND означает «Berkeley Internet Name Domain».
Наиболее широко используемое программное обеспечение сервера имен, BIND – это программное обеспечение с открытым исходным кодом, которое реализует протоколы доменных имен (DNS) для Интернета.
BIND на сегодняшний день является наиболее широко используемым программным обеспечением DNS в Интернете, обеспечивая надежную и стабильную платформу.
1) Очистить кеш DNS на Ubuntu / Debian / LinuxMint
Используйте приведенную ниже команду для очистки кеша DNS в системах Ubuntu / Debian / Mint.
2) Сброс кеша dns сервера BIND
Используйте приведенную ниже команду для сброса кеша BIND сервера dns
3) Очистить кэш nscd DNS
Используйте команду ниже:
4) Очистить dnsmasq dns кэш
Используйте приведенную ниже команду для стирания кеша dnsmasq server dns
5) Очистка кеша dns в Windows
Используйте приведенную ниже команду для очистки кеша dns в Windows:
Источник
🌐 Как очистить или стереть кеш DNS на Linux
Зачем очищать или удалять кеш DNS?
У очистки локального кеша DNS может быть много причин.
Например, вы могли настроить свой веб-сайт или изменить настройки DNS для своего домена, или у вас возникли проблемы с подключением к Интернету.
В таких случаях, если вы попытаетесь посетить сайт, ваша ОС, скорее всего, получит кешированную версию сайта из локального кеша DNS.
Таким образом, очистка локального кеша DNS приведет к удалению всех записей из базы данных локального кеша DNS и заставит вашу систему повторно заполнить кеш DNS новыми записями с реального DNS-сервера и отобразить новую копию веб-сайта.
Как очистить кеш DNS в Linux
По умолчанию кэширование DNS не установлен и/или не включен на уровне операционной системы Linux.
Вместо этого приложения, например веб-браузеры, поддерживают свой собственный внутренний кеш.
Таким образом, вы можете просто очистить кеш своего браузера или перезапустить его, чтобы устранить проблемы с подключением к Интернету, решить проблемы с подменой DNS (например, отравление кеша DNS) и решить проблемы с устаревшим контентом.
Если ваш дистрибутив Linux действительно использует какие-либо службы кэширования DNS, вам необходимо вручную очистить их, как описано ниже.
Есть несколько способов очистить кеш DNS.
Это зависит от дистрибутива Linux и службы кэширования DNS, которую вы используете.
Здесь я включил инструкции по очистке наиболее часто используемых служб кэширования DNS на Linux.
1. Служба кэширования DNS Systemd-resolve.
Systemd-resolve – это служба systemd, которая предоставляет службу кэширования DNS на системном уровне для локальных приложений.
Это часть пакета systemd, который устанавливается по умолчанию.
Это служба ключена по умолчанию в большинстве современных операционных систем Linux, таких как Fedora и Ubuntu.
Во-первых, давайте проверим, активна ли служба systemd-resolved, используя команду:
В моей системе активна служба systemd-resolved.
Давайте посмотрим статистику службы кеширования systemd-resolve с помощью команды:
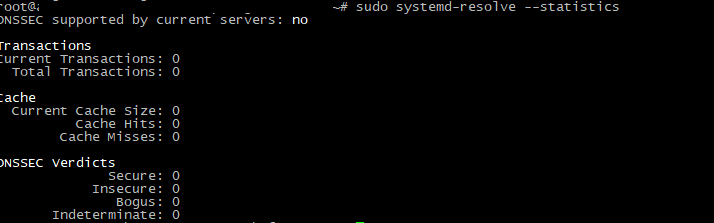
Как вы видите, в приведенных выше выходных данных указано общее количество текущего размера кеша, хитсов и пропущенных кешей.
Чтобы очистить кеш systemd-resolve, запустите:
При успешном выполнении вы не увидите никакого вывода.
Теперь проверьте статистику systemd-resolve, чтобы убедиться, очищен ли локальный кеш DNS.
Теперь вы увидите, что текущий размер кеша равен нулю.
2. Служба кеширования DNS Nscd.
Nscd, сокращение от name service cache daemon, – это демон кэширования, который предоставляет кеш для наиболее распространенных запросов службы имен.
Это предпочтительный сервис кэширования для большинства систем на базе Redhat.
Если ваша система Linux использует службу кэширования nscd, вы можете очистить локальную службу кэширования DNS, просто перезапустив службу nscd, как показано ниже:
3. Служба кэширования Bind / Named DNS.
Berkeley Internet Name Domain (сокращенно BIND) – самый популярный DNS-сервер с открытым исходным кодом, используемый сегодня.
Если вы используете BIND для кеширования DNS-запросов, используйте следующие команды для очистки / сброса службы кэширования BIND в Linux:
Источник
How To Clear Or Flush DNS Cache In Linux
This brief guide explains all possible ways to clear or flush DNS cache in Linux operating systems. For those wondering, DNS cache (or sometimes called a DNS resolver cache) is a small temporary database maintained by the operating systems. It stores the information about all visited websites and other Internet domains. In other words, the DNS cache contains recent DNS lookups. When you visit the same website multiple times, the OS retrieves the DNS records of that website from the local DNS cache database instead of the actual public DNS server. Hence DNS caching improves the website loading time and reduces the origin DNS server’s bandwidth/CPU consumption.
Why should you clear or flush DNS cache?
There could be many reasons to clear the local DNS cache. For instance, you might have customized your website or changed the DNS settings for your domain or you are facing some Internet connectivity issues. In such cases, if you attempt to visit the site, your OS will likely to get the cached version of the site from the local DNS cache. So clearing the local DNS cache will delete all entries from the local DNS cache database and force your system to repopulate the DNS cache with new entries from the actual DNS server and display the fresh copy of the website.
Clear Or Flush DNS Cache In Linux
By default, the DNS caching is not installed and/or enabled at the operating system level in Linux. Instead, applications like web browsers maintain their own internal cache. So you can simply clear your browser’s cache or restart them to fix the Internet-connectivity issues, resolve DNS spoofing (e.g. DNS cache poisoning) issues and resolve stale content issues. If your Linux distribution does use any DNS caching services, you need to manually clear them as described below. There are multiple ways to clear DNS cache. It varies depends upon the Linux distribution and DNS caching service you are using. Here I have included instructions to clear the most commonly used DNS caching services in Linux.
1. Clear Systemd-resolve DNS caching service
Systemd-resolve is a systemd service that provides system-level DNS caching service for local applications. It is part of the systemd package which is installed by default. Systemd-resolved service is enabled by default in most modern Linux operating systems such as Fedora and Ubuntu. First, let us check if systemd-resolved service is active or not using command:
If systemd-resolved service is enabled, you will see «active» in the output. If it is not active, it will print «inactive».

Check if systemd-resolved service is active
As you see in the above output, systemd-resolved service is active in my system.
Let us view the statistics of systemd-resolve caching service with command:
Sample output:

As you see, the above output lists the total no of current cache size, hits and missed caches.
To flush the systemd-resolve cache, run:
On successful execution, you will not see any output.
Now, check the systemd-resolve statistics to verify if the local DNS cache is cleared or not.
You will now see current cache size as zero.

Display systemd-resolve statistics
2. Clear Nscd DNS caching service
Nscd, short for name service cache daemon, is a caching daemon that provides a cache for the most common name service requests. It is the preferred caching service for most Redhat-based systems. If your Linux system is using nscd caching service, you can clear or flush the local DNS caching service by simply restarting the nscd service like below:
3. Clear Bind/Named DNS caching service
Berkeley Internet Name Domain (shortly BIND) is the most popular open source DNS server in use today. If you are using BIND for caching DNS queries, use the following commands to clear/flush BIND caching service in Linux:
The latest BID version allows you to clear DNS cache for a specific domain as well. The following command clears the DNS cache for ostechnix.com domain:
You can also clear DNS cache for entire LAN and WAN zones like below:
4. Clear Dnsmasq DNS caching service
Dnsmasq is a lightweight DHCP and caching DNS server with support for PXE and TFTP server. It is suitable for resource constrained routers and firewalls to manage small networks.
If you are using dnsmasq as caching service, you can flush the local DNS caching service like below:
Another way to c lear local DNS cache in Ubuntu and other Ubuntu variants such as Linux Mint is to run the following command:
Источник


