- Инсталляция и настройка клиента Cisco VPN на Windows 10
- Установка и настройка Cisco VPN Client
- Процесс инсталляции
- Конфигурация подключения
- Устранение ошибки подключения
- Full VPN Setup on Citrix NetScaler Gateway
- Create Session Profile
- Create Session Policy
- Configure the VPN Virtual Server
- Bind the SSL certificate
- Add authentication
- Bind the session policy
- Testing with clients
- Windows 10 SSL VPN client
- Apple iOS (iPhone / iPad) client
Инсталляция и настройка клиента Cisco VPN на Windows 10
Cisco VPN – весьма популярный софт, который предназначен для удаленного доступа к элементам частной сети, поэтому используется он в основном в корпоративных целях. Данная программа работает по принципу клиент-сервер. В сегодняшней статье мы рассмотрим подробно процесс установки и настройки клиента Cisco VPN на устройствах под управлением Windows 10.
Установка и настройка Cisco VPN Client
Для того чтобы установить ВПН клиент Cisco на Windows 10, потребуется выполнить дополнительные действия. Это связано с тем, что программа перестала официально поддерживаться еще с 30 июля 2016 года. Несмотря на данный факт, сторонние разработчики решили проблему запуска на Windows 10, поэтому программное обеспечение Cisco VPN актуально и по сей день.
Процесс инсталляции
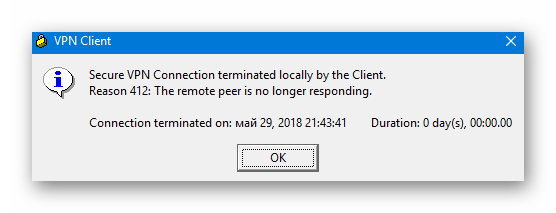
Если попытаться запустить программу стандартным способом без дополнительных действий, то появится вот такое уведомление:
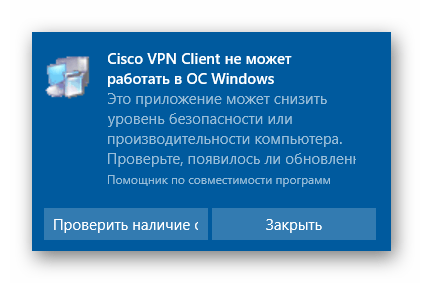
Для корректной же установки приложения вам необходимо сделать следующее:
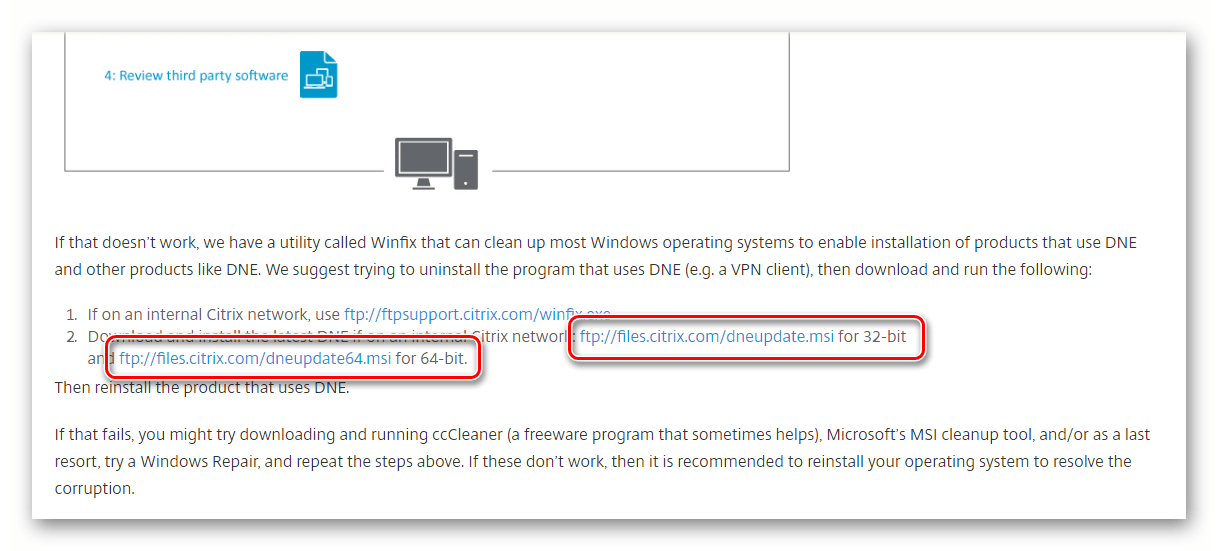
- Перейти на официальную страницу компании «Citrix», которая и разработала специальное ПО «Deterministic Network Enhancer» (DNE).
- Далее необходимо найти строки со ссылками на загрузку. Для этого опуститесь почти в самый низ страницы. Нажмите на том участке предложения, которое соответствует разрядности вашей операционной системы (х32-86 или х64).

В главном окне «Мастера установки» нужно ознакомиться с лицензионным соглашением. Для этого поставьте галочку напротив строки, которая отмечена на скриншоте ниже, а потом нажмите кнопку «Install».
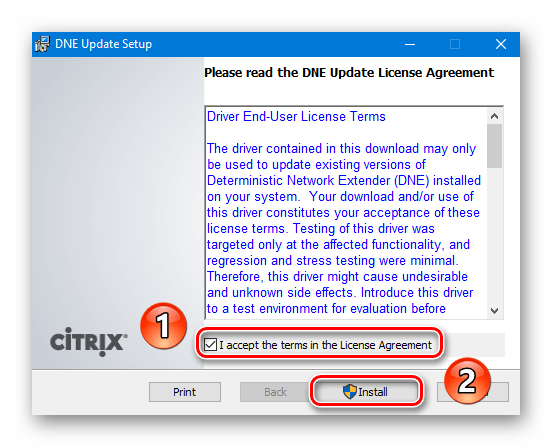
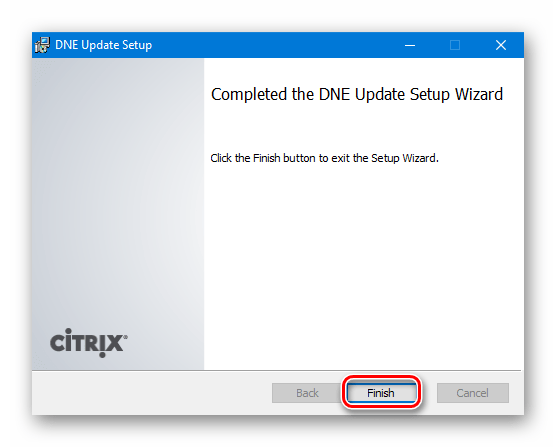
После этого начнется установка сетевых компонентов. Весь процесс будет выполняться автоматически. Вам нужно будет лишь немного подождать. Спустя некоторое время увидите окно с уведомлением об успешной установке. Для завершения нажмите кнопку «Finish» в этом окне.
Следующим шагом будет загрузка установочных файлов Cisco VPN. Сделать это можно на официальном сайте либо же перейдя по зеркальным ссылкам ниже.
В результате у вас на компьютере должен быть один из следующих архивов.
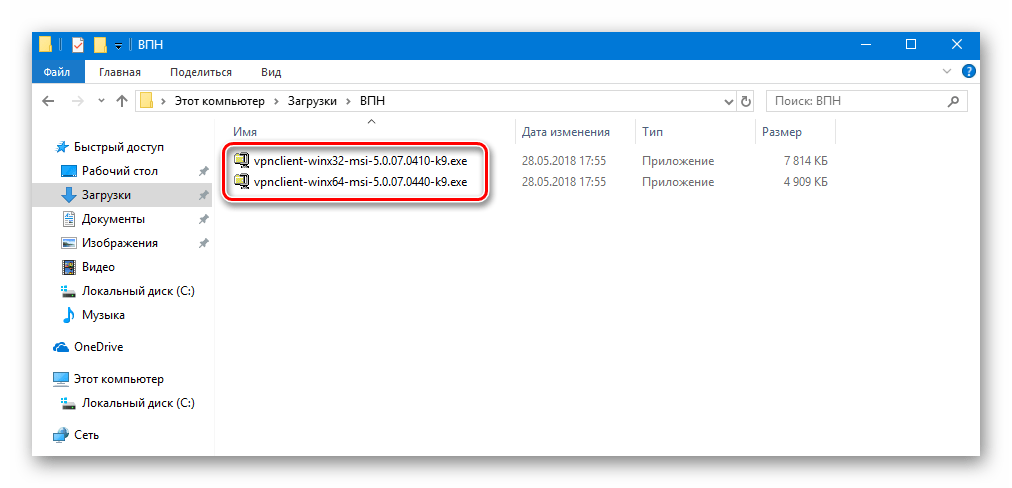
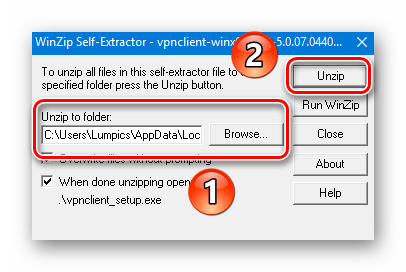
Теперь кликните по скачанному архиву два раза ЛКМ. В результате вы увидите небольшое окошко. В нем можно выбрать папку, куда будут извлечены установочные файлы. Нажмите на кнопку «Browse» и выберите нужную категорию из корневого каталога. Затем нажмите кнопку «Unzip».
Обратите внимание, что после распаковки система попытается автоматически запустить инсталляцию, но на экране появится сообщение с ошибкой, которое мы опубликовали в начале статьи. Дабы это исправить, необходимо зайти в папку, куда ранее были извлечены файлы, и запустить оттуда файл «vpnclient_setup.msi». Не перепутайте, так как в случае запуска «vpnclient_setup.exe» вы снова увидите ошибку.

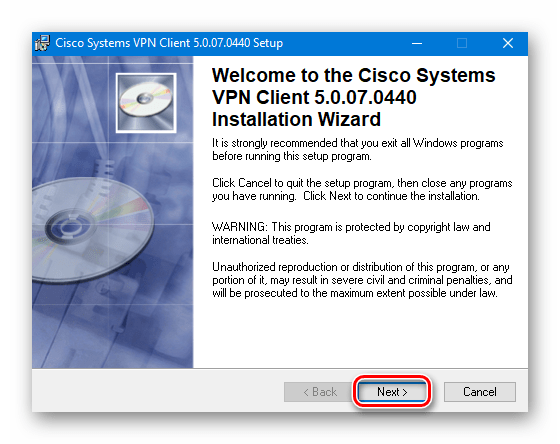
После запуска появится главное окно «Мастера установки». В нем следует нажать кнопку «Next» для продолжения.
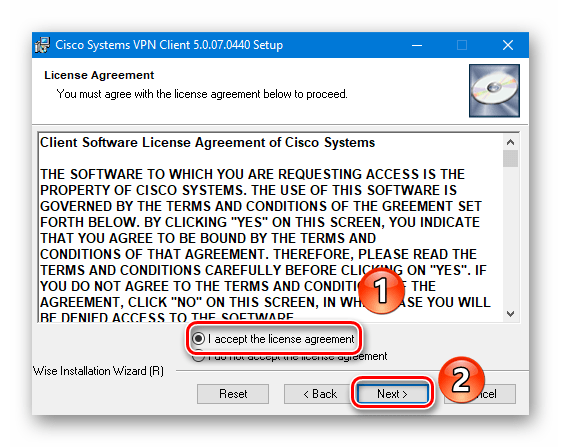
Далее необходимо принять лицензионное соглашение. Просто поставьте отметку возле строки с соответствующим названием и нажмите кнопку «Next».
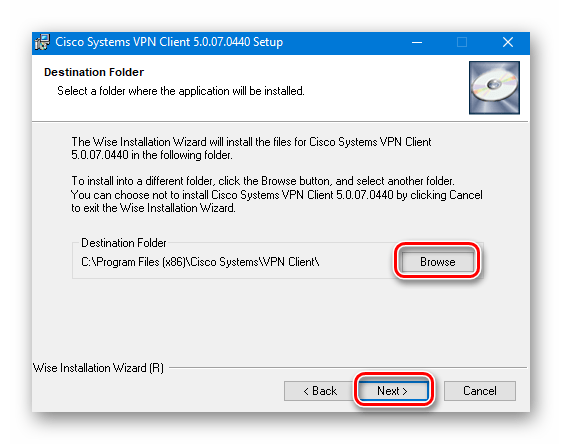
Напоследок остается лишь указать папку, куда программа будет инсталлирована. Мы рекомендуем оставить путь без изменений, но при необходимости можно нажать кнопку «Browse» и выбрать другой каталог. Затем нажмите «Next».
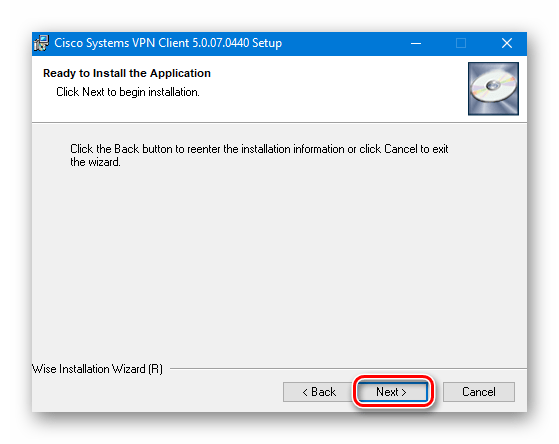
В следующем окне появится сообщение о том, что все готово к установке. Для начала процесса жмем кнопку «Next».
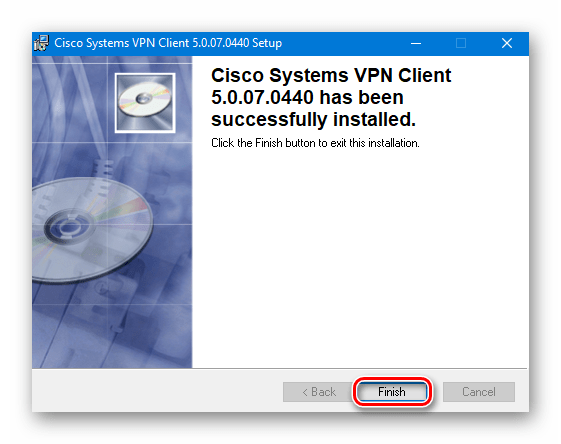
После этого начнется непосредственно установка Cisco VPN. По окончании операции на экране появится сообщение об успешном завершении. Остается лишь нажать кнопку «Finish».
На этом процесс инсталляции Cisco VPN Client подошел к концу. Теперь можно приступить к настройке подключения.
Конфигурация подключения
Настроить Cisco VPN Client легче, чем может показаться на первый взгляд. От вас потребуется лишь определенная информация.
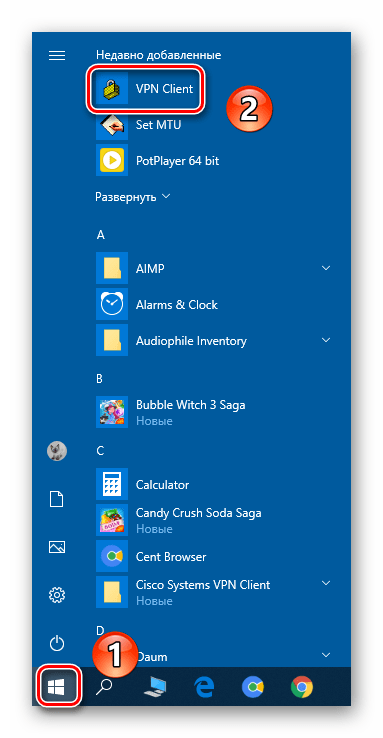
- Нажмите на кнопку «Пуск» и выберите из списка приложение Cisco.
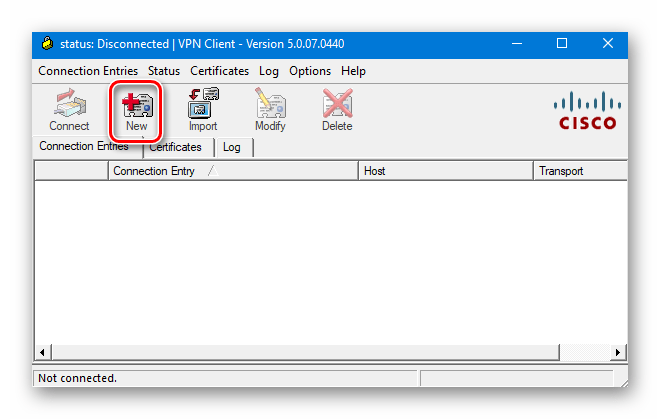
Теперь нужно создать новое подключение. Для этого в открывшемся окне нажмите на кнопку «New».
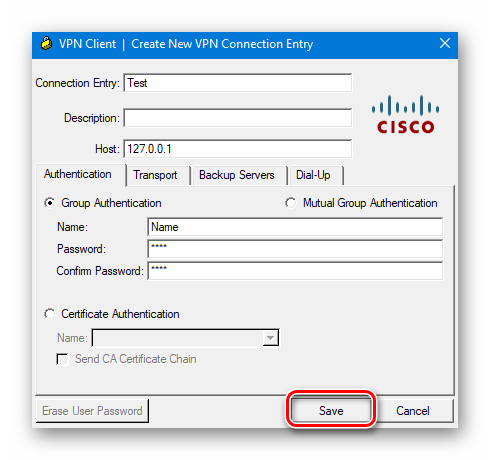
В результате появится другое окно, в котором следует прописать все необходимые настройки. Выглядит оно следующим образом:

- «Connection Entry» – Имя подключения;
- «Host» – В данном поле указывается IP-адрес удаленного сервера;
- «Name» в разделе «Authentication» — Тут следует прописать имя группы, от лица которой будет происходить подключение;
- «Password» в разделе «Authentication» — Здесь указывается пароль от группы;
- «Confirm Password» в разделе «Authentication» — Сюда повторно пишем пароль;
Обратите внимание, что всю необходимую информацию обычно предоставляет провайдер либо системный администратор.
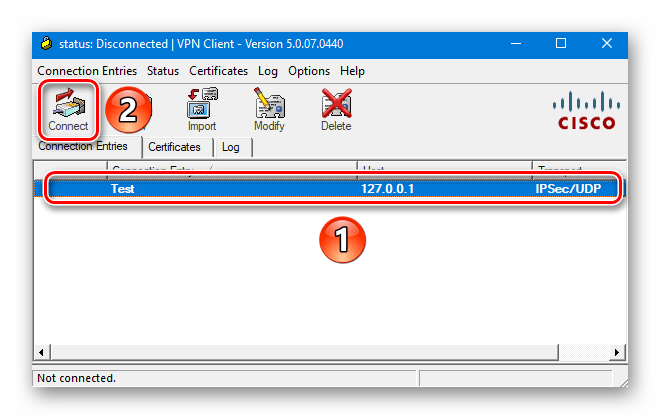
Если процесс подключения пройдет успешно, вы увидите соответствующее уведомление и иконку в трее. После этого VPN будет готов к использованию.
Устранение ошибки подключения
К сожалению, на Windows 10 попытка подключиться к Cisco VPN очень часто заканчивается следующим сообщением:
Чтобы исправить ситуацию, следует выполнить следующее:
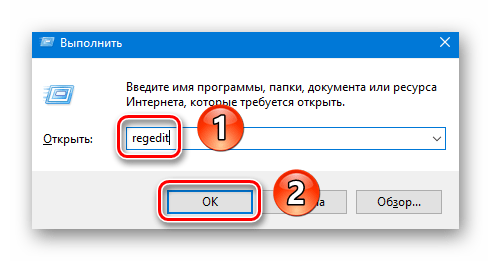
- Используйте сочетание клавиш «Win» и «R». В появившееся окно впишите команду regedit и нажмите кнопку «OK» немного ниже.
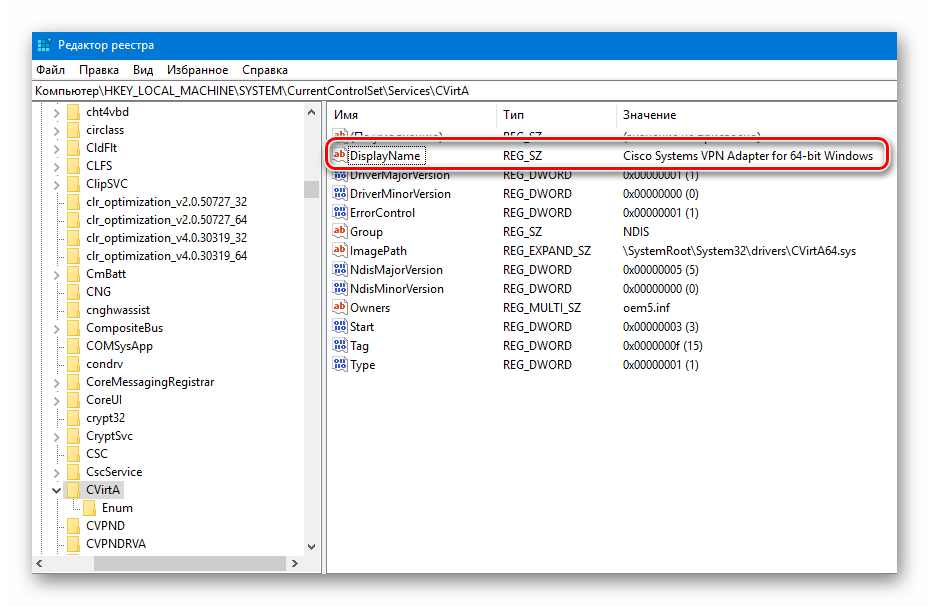
В результате увидите окно «Редактор реестра». В левой его части находится дерево каталогов. В нем нужно перейти по такому пути:
HKEY_LOCAL_MACHINE\SYSTEM\CurrentControlSet\Services\CVirtA
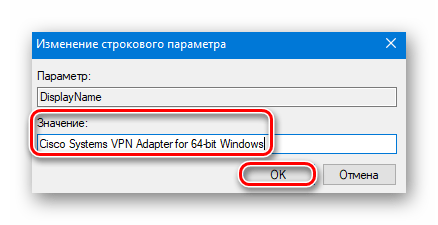
Внутри папки «CVirtA» следует найти файл «DisplayName» и нажать по нему дважды ЛКМ.

Откроется маленькое окошко с двумя строками. В графу «Значение» нужно вписать следующее:
Cisco Systems VPN Adapter — если у вас Windows 10 x86 (32 bit)
Cisco Systems VPN Adapter for 64-bit Windows — если у вас Windows 10 x64 (64 bit)
После этого нажмите кнопку «OK».
Убедитесь, что значение напротив файла «DisplayName» изменилось. Затем можете закрыть «Редактор реестра».
Проделав описанные действия, вы избавитесь от ошибки при подключении к VPN.
На этом наша статья подошла к своему завершению. Надеемся, у вас получится установить клиент Cisco и подключиться к нужному VPN. Отметим, что данная программа не подойдет для обхода различных блокировок. Для этих целей лучше использовать специальные браузерные расширения. Ознакомиться со списком таковых для популярнейшего браузера Google Chrome и ему подобных вы можете в отдельной статье.
Full VPN Setup on Citrix NetScaler Gateway
Table of Contents
So you have Citrix NetScaler running to load balance your Microsoft Exchange 2016 infrastructure. What else can you use it for you ask yourself. Well, you know that VPN appliance you have running just for VPN? Get rid of it, because Citrix NetScaler can provide you with full-blown SSL VPN! With Citrix NetScaler VPN you can provide your end-users with full SSL VPN (Virtual Private Network) access in order to ensure that resources in your network are securely accessed. Citrix NetScaler provides access to any device anywhere.
Deliverables of this post:
- Citrix NetScaler SSL VPN Setup with full access to your network.
- SSL VPN access using Microsoft Windows 10 desktop.
- SSL VPN access using Apple iOS (iPhone or iPad).
Requirements for the configuration:
- Citrix NetScaler 11.1 (www.citrix.com).
- NetScaler Gateway Universal License.
- Ip addresses for the virtual server for VPN.
- Valid SSL certificate.
- Active Directory for user authentication.
- A hostname, in my case https://vpn.vikash.nl. This must match your SSL certificate.
My homelab setup
I am running this whole setup from my Microsoft Hyper-V 2016 Server, running all of my Microsoft Windows virtual machines. This Hyper-V Server is also running my Citrix NetScaler.
Create Session Profile
First we have to create the session profile and then the session policy. Navigate to NetScaler Gateway -> Policies -> NetScaler Gateway Policies and Profiles -> Session and click on Session Profiles. Then click on Add.

Give the profile a name and click on Client Experience tab.
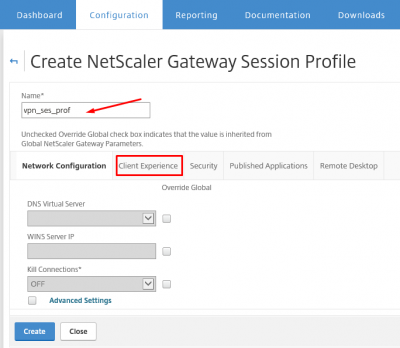
Set the time-out values according to your needs. Because we want to redirect all the traffic from the client through the SSL VPN tunnel set Split Tunnel to OFF. Set the plug-in type to Windows/MAC OS X.

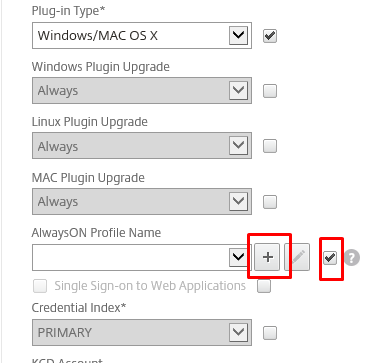
We have to create an AlwaysON profile. Click on the + (plus) sign.
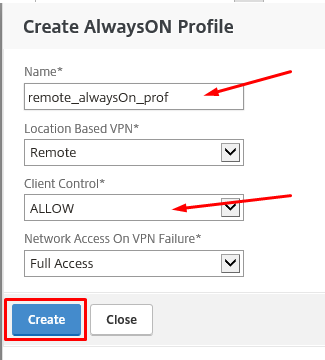
Give the AlwaysON profile a name and set Client Control to ALLOW. Click then on Create.
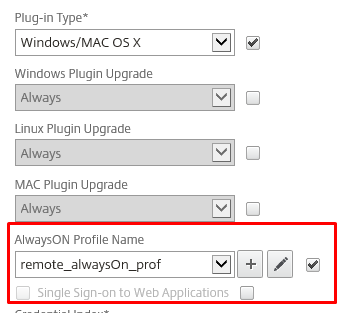
Make sure the AlwaysON profile we just created is selected.
Now click on the tab Security and set the Default Authorization Action to ALLOW.

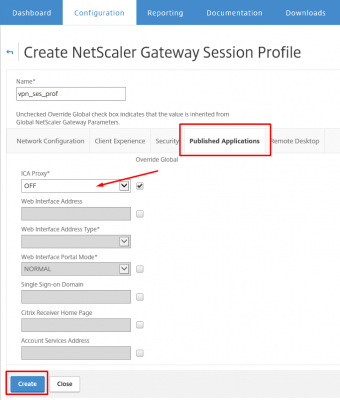
Click on the Published Application tab and make sure that ICA Proxy is set to OFF. Then click on Create.
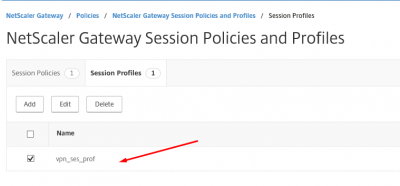
So now your session profile should be available in the Session Profiles overview.
Create Session Policy
After creating the session profile, it is time to create the Session Policy for the session profile we just created. Navigate to NetScaler Gateway -> Policies -> NetScaler Gateway Policies and Profiles -> Session Policies. Click on Session Policies and then click on Add to create a new policy.

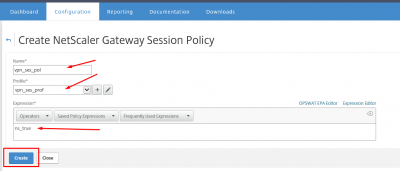
Give the policy and name and enter ns_true in the Expression section. Then click on Create.
The newly created policy should now be available in the Session Policies overview.

Configure the VPN Virtual Server
After creating the profile and policy we can now create the NetScaler Gateway Virtual Server. This is the virtual server providing the VPN access to the end-user. So if you have firewall or nat-appliances, make sure that your external port 443 is redirected to this virtual server.
Navigate to NetScaler Gateway -> NetScaler Gateway Servers -> Virtual Servers and click on Add.

Give the virtual server a name. Set the IP address and click on OK.

Bind the SSL certificate
Let’s bind the SSL certificate to this virtual server. Click here to check my post about importing SSL certificates on Citrix NetScaler. Click on No Server Certificate.

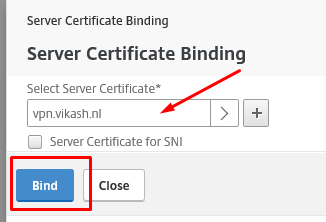
Select the SSL certificate and click on Bind.
Click on Continue.

Add authentication
I am using my Active Directory as primary (and only) user authentication. If you require second authentication, you can add it here as well.
Click on the + (plus) sign on the Basic Authentication horizontal bar.

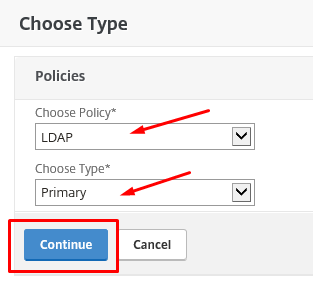
Select LDAP for Active Directory authentication. Choose Primary as Type. Click on Continue.
Select your LDAP policy. This contains the Active Directory authentication server. Click then on Bind.

Click on Continue.

And click again on Continue.

Bind the session policy
Now we can bind the session policy created earlier. Click on the + (plus) sign on the Policies horizontal bar.

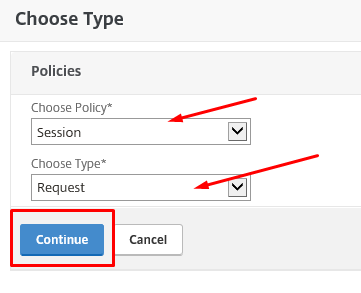
Make sure you have Session as policy and Request as type selected. Click on Continue.
Select the session policy we created earlier in this post and click on Bind.

Now click on Done.

In the overview of the NetScaler Gateway Virtual Servers we can see the virtual server being available with status UP.

Testing with clients
So now we have configured the VPN service on Citrix NetScaler, it is time to test it using different endpoints. In my case I will test using a Windows 10 desktop, and an Apple iPhone with iOS 10.2.1.
Windows 10 SSL VPN client
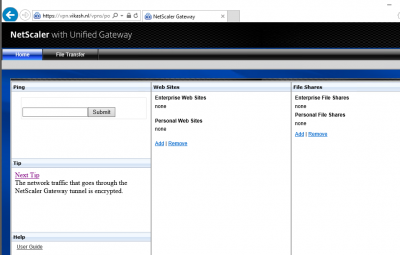
Start a browser on your desktop, and navigate to the hostname where the virtual server is listening. In my case that is https://vpn.vikash.nl. This translates to the IP address of the virtual server on my NetScaler.
Enter a username and password. Click on Log On.


Because this desktop client logs in for the first time, it does not have the NetScaler Access Gateway Plug-in installed. You will be prompted to install it. Click on Download and then Run the installer.

Click on Install.

When the installation process finishes, click on Finish.

The browser page will refresh, and you will have a full-blown SSL VPN session now using Citrix NetScaler.
Check the status of the SSL VPN session using the NetScaler Gateway status option by clicking the icon in the notification area in the taskbar.

Apple iOS (iPhone / iPad) client
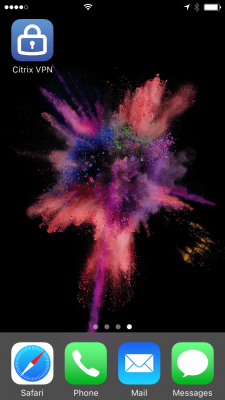
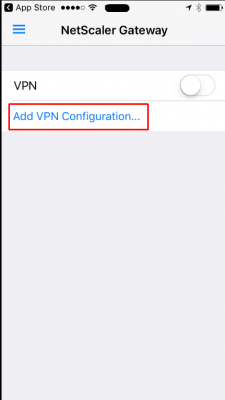
Make sure you have installed the Citrix VPN app from the Apple App Store. Get it here. Start the app on your iPhone.
Tap on Add VPN Configuration.
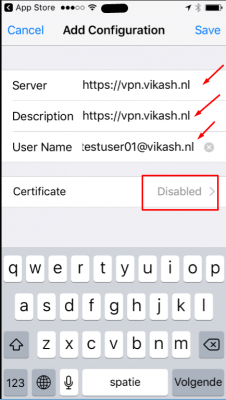
Enter the VPN details and add a user account. Tap on Disabled to set the Certificate options.
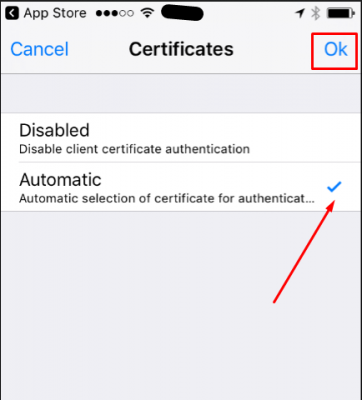
Select the Automatic option. Tap on Ok.
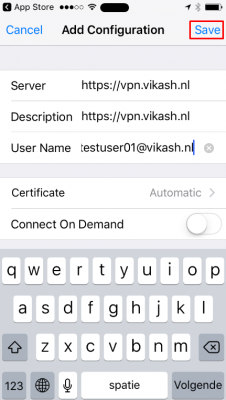
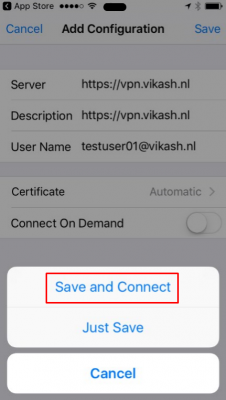
Now tap on Save.
And then tap on Save and Connect to start the VPN connection.
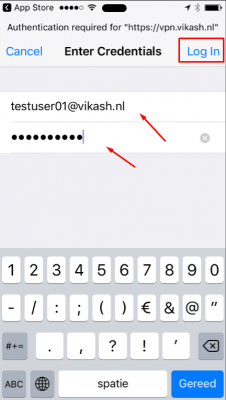
You will be prompted to enter the password for the user. Then tap on Log In.
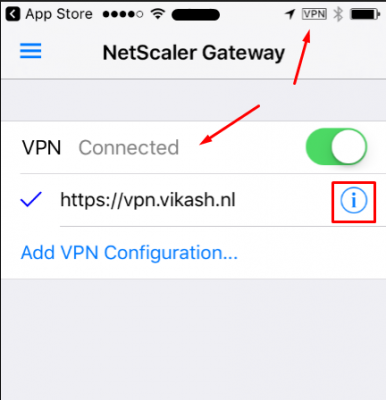
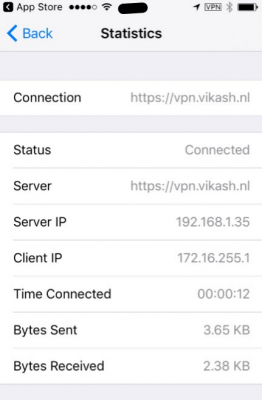
The VPN should now be connected! You can also see the connection status in the app and on the upper-right corner of your iOS device. If you tap op the i next to Connected you can see more information about the VPN session.
This concludes this tutorial. Feel free to contact me of you have any questions or comments.
You can follow me on twitter or add the RSS feed from my blog and you will be notified when I add new posts.


