Мой дневник
Linux for Chuwi Hi10
UPD 01.12.2017: Вопрос практически решен. Установил свежую Fedora. Ядро понимает почти все железо, умеет уходить в standby и главное возвращаться из него ). Debian с ядром 4.9 не подошел. Можно наверное ядро заменить, но на шапке все хорошо подобрано. Тачскрин пока не использую, звук и видео на hdmi выводится (правда hdmi иногда теряет).
Продолжаю воевать в кривым железом Chuwi Hi10.
Цель – получить приличную рабочую лошадку.
Вначале было… UEFI. Первое, что было сделано, это ужимание штатного раздела windows, создание раздела для linux, установка туда Debian Jessie (впрочем, можно и другие варианты), настройка EFI и GRUB. Если будет много каментов – создам отдельную страничку.
До выхода ядра 4.8 драйвер i915 выдавал массу ошибок. Но теперь ситуация изменилась. Однако, оставалась большая проблема с HDMI – в линуксе он вроде бы совсем не работал, под штатным windows – срабатывал только если снести драйвер и дать его снова поставить (!)
Итак, для начала, была решена проблема с wifi: в ядро добавлен модуль https://github.com/hadess/rtl8723bs Тонкости:
- в bios установлено south bridge LSS&… SDIO control ->PCI
- в ядре патч: /net/wireless/Kconfig -> config WIRELESS_EXT – bool + def_bool y
- патчи от модуля на ядро 4.8 не ставятся и не нужны, нужен только патч laszlo из ветки https://github.com/hadess/rtl8723bs/issues/76 (https://github.com/hadess/rtl8723bs/files/379444/0001-My-changes-for-4.7.0-rc7-for-Baytrail-T.patch.txt
После этого wifi работает отлично, лагов нет. К сведению, существует другой драйвер wifi, но на новых ядрах он не собирается (https://github.com/anthonywong/rtl8723bs)
Важно: я запустил свое ядро на github! https://github.com/sae/linux/tree/hi10
На данный момент работает:
- wifi
- hdmi audio
- battery status (через скрипт axpd)
- тачскрин – не полностью, драйвер есть но отображение “зеркальное”
А вообще обновления теперь будут в файле README.sae
Большая проблема – с шиной i2c. Без семафора шина не работает, семафор стандартный тоже. Проблема случайно решилась в одной ветке дискуссий: — a/drivers/i2c/busses/i2c-designware-baytrail.c
+++ b/drivers/i2c/busses/i2c-designware-baytrail.c
@@ -22,7 +22,7 @@
#include “i2c-designware-core.h”
#define SEMAPHORE_TIMEOUT 100
-#define PUNIT_SEMAPHORE 0x7
+#define PUNIT_SEMAPHORE 0x10E //0x7
#define PUNIT_SEMAPHORE_BIT BIT(0)
#define PUNIT_SEMAPHORE_ACQUIRE BIT(1)
После этого патча устройства стали доступны!
Дальше я занялся HDMI. Глюки пока не полностью выловлены, но прогресс есть. Оказалось, выход hdmi заведен на порт HDMI-2, хотя при выключенном телевизоре edid можно получить с порта gmbus panel. Самое веселое что при включении телевизора edid пропадает. Поэтому:
xrandr –newmode “1920x1080_60.00” 173.00 1920 2048 2248 2576 1080 1083 1088 1120 -hsync +vsync
xrandr –output HDMI-2 –addmode HDMI-2 1920x1080_60.00
xrandr –output HDMI-2 –mode 1920x1080_60.00
Тачскрин: у меня в ACPI устройство видно как CHPN0001, частично походит драйвер chipone_ts (https://github.com/Dax89/chuwi-dev), но выдает координаты перевернутые относительно центра экрана. Поскольку код открытый, буду адаптировать в ближайшее время.
*Звук, в сети много патчей, нужно пробовать, в том числе вывод на hdmi
+Питание и батарея – используем AXP288 и его множество функций
Источник
Chuwi hi10 linux install
- BIOS DualBoot — для V400 E4D6_C106_E0511.233 (Серийный номер 16ххх) + Инструкция по прошивке
- BIOS DualBoot — для V400 E4D6_C106_E0511.224 (Серийный номер 16ххх) + Инструкция по прошивке
- BIOS SingleBoot 60D для V400 (Серийный номер 16xxx)
- BIOS 608 x64 для V300 (Серийник 1511ххх)
- BIOS 608 x64 для V200 (сетевой адаптер Broadcom)
- Инструкция по прошивке
На данный момент последняя версия БИОС для ревизий V200 и V300 — это 608.
Дуалбут работает только на ревизиях V400 попытка прошить ревзию V200 или V300 биосом от V400 — окирпичивает устройство.
Сообщение отредактировал stp101 — 20.05.19, 23:23
Сообщение отредактировал dolgorick — 30.09.15, 03:17
Intel® Atom™ x5-Z8300 Processor
(2M Cache, up to 1.84 GHz)
Макс. объем памяти (зависит от типа памяти) 2 GB
Может опечатка в описании планшета и у него другой процессор?:
Intel® Atom™ x5-Z8500 Processor
(2M Cache, up to 2.24 GHz)
Макс. объем памяти (зависит от типа памяти) 8 GB
Разница в стоимости процессоров 5$, будет странно если сэкономили на проце и при этом поставили память, которая не будет поддерживаться в полном объеме.
Сообщение отредактировал ksystem5 — 02.10.15, 20:14
То что Cherry Trail, это не значит что поддержка 4 GB памяти. Все зависит от контроллера памяти.
Кстати есть схожая модель на том же процессоре и 4 GB памяти, PIPO W1S (CPU Intel Cherry Trail Z8300 quad core, RAM 4GB) — http://www.pipo-store.com/pipo-w1s.html
И уже сейчас с 4 GB памяти PIPO W1S можно купить на ebay, http://www.ebay.com/it…r=&hash=item2808ff9c89
Вот интересно, это программный фикс для поддержки 4GB памяти Intel Cherry Trail Z8300 или Intel сам не знает что пишет в описании процессора? Третьего не дано.
Сообщение отредактировал ksystem5 — 03.10.15, 09:21
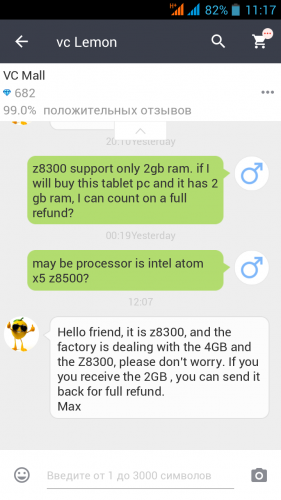
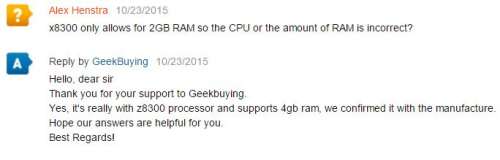
Очередное подтверждение про Z8300 и 4 Гб ОЗУ с geekbuying:
|
Из последних новостей( что-то тут тема не сильно жива). Чуви организовало сбор денег на этот планшет и не понятно, что будет если деньги не соберут. Сообщение отредактировал sh0ked — 25.10.15, 15:38
Сообщение отредактировал dim565 — 25.10.15, 16:25 какой смысл помогать собирать деньги для чуви, когда вокруг полно конкурентов уже фактически начавших продавать тоже самое и без всякого сбора (тот же pipo w1s). Меня больше всего интересует, что там будет с системой охлаждения. Добавлено 25.10.2015, 16:44: и кому нужен usb 3.0 на планшете такого уровня? для чего? ерунда. Сообщение отредактировал sdfsdfs — 25.10.15, 16:42 Согласен, устарел уже USB 3.0. Сюда бы USB Type-C 🙂 Но видимо не судьба Сообщение отредактировал dim565 — 25.10.15, 16:57 более мощный спу скорее всего не ставят как раз из-за невозможности справиться с нагревом. у меня есть приставочка pipo x7 и вот по ней я знаю, что китайцев (по крайней мере pipo) абсолютно не волнует что там с нагревом и перегревом. а потом народ купивший этот продукт годами дорабатывает собственными руками охлаждение. а учитывая, что это планшет, а не пк, то своими руками там уже мало что можно будет доработать. у чуви заявлены 2х мегапиксельные камеры. пипо выходит покруче. правда у пипы заявлен аккум на 6. у чуви 8. как-то не верится что в одиноковых по размеру корпусах решили настолько разные аккумуляторы конкуренты засунуть. Добавлено 27.10.2015, 21:04: и никто не подскажет, по фоткам если планшет к клаве подключить, он только в одном положении (грудусах) будет зафиксировано.
я так же посмотрел видео, где мужик доделывает охлаждение у чуви. так вот мужик кладет медные пластинки и якобы все. температура теперь не превышает 50 градусов. просто зимой я купил чудо инженерной мысли pipo x7 в лице первых покупателей. и вот теперь хочет планшет, но уже по вскрытию чуви видется, что точно такая же байда, абсолютно никак не продумано охлаждение, и 100% через 10 минут игр или видео, система будет в тротлинг уходить. как собственно на видео в обзоре это уже показано. спрашивается нахрен оно тогда надо.. я удивляюсь китайцам. доделать охлаждение максимум 10$ стоит. неужели так сложно продавать вещи которые не требуют допила. Медные пластины улучшают тепловой контакт проца с задней крышкой планшета ну и соответственно. А если по теме то чуви мне импонирует из-за двух полноценных юсб, ни у кого больше не видел. Источник Chuwi hi10 linux installDisclaimer: I got this device from the Manufacturer to test Linux on it. The below findings are my own and express my own opinion. Specs and short review:
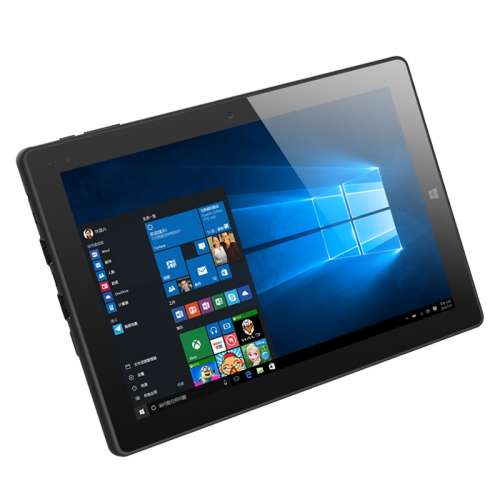
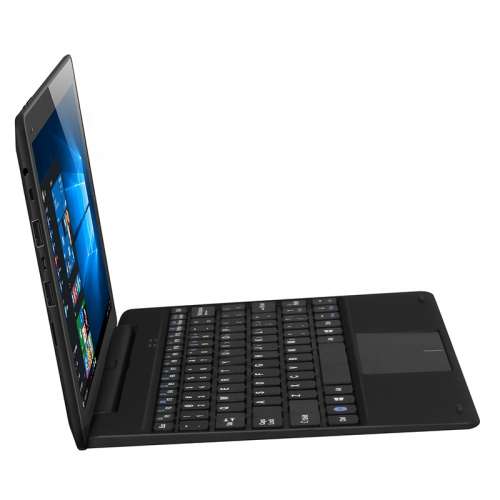
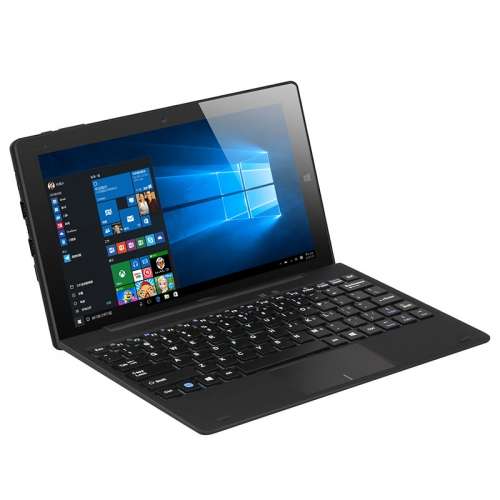
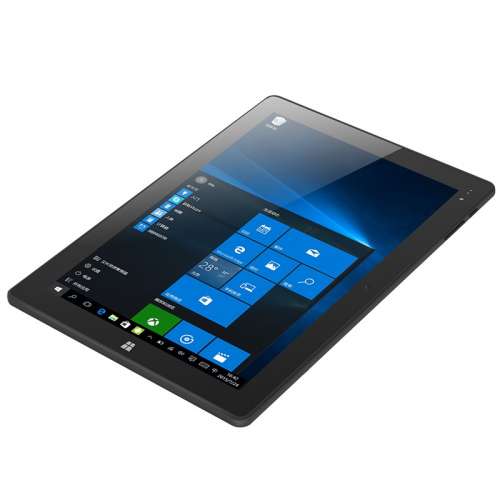
The Chuwi Hi10 Air is a compact 10.1″ Tablet running a Windows 10. It has a sturdy Aluminium Body and the overall build quality is astonishing. The speakers are surpisingly good for a tablet in that price segment. Paired with Bluetooth, a headphone jack and the 1920×1200 WUXGA display it’s perfect for all kind of Media Playback. The battery is powerful enough to easily survive a few Movies. The optional detachable keyboard is a welcome addition for when you need to write some text. The keyboard is nice to type on, but I had cases where it would send keys out of nowhere. I can’t guarantee that’s not caused by the few drops of water I accidentally spilled on the connection to the tablet at some point. I’m not a big fan of the trackpad, mainly because it’s way to small to be usable for me but that might be because I am used to the trackpad on my 15″ MacBook Pro. The Touchpen is very accurate thanks to the digitizer, however the touchscreen does not send different signals for Pen and Finger to the System. That means trying to take notes while resting your hand on the screen doesn’t really work. Sadly, the full Windows 10 install user experience is really impacted by the entry level Intel Atom Z8350. It’s just not powerful enough to accomplish any advanced tasks. However, Chuwi sent me the device to bring linux to it, so that’s what I did. This allows us to use lighter Window Managers and therefore more resources for actual tasks, resulting in a better performance. What follows is a guide on how to setup on how to install Arch Linux on your Chuwi Hi10 Air. First of all you need to install Linux on the tablet. That means you will erase your internal Windows installation, so make sure to either do a backup of it, or at least make yourself familiar with how to reinstall Windows in case it’s needed. Please note that you can NOT install Linux on an SDCard because the BIOS can not boot from the SDCard. Next up, it’s time to choose your Linux distro. I recommend anything that is based on Arch Linux and that uses either LightDM or lxdm, because that is what my guide will be using to setup certain features. Of cause you’re free to choosewhatever you want. That means you could for example use Antergos, an ArchLinux based distro that includes Desktop managers (for Antergos I recommend XFCE), or go the hard way and install ArchLinux from scratch and use lxdm with LXQt. LXQt proved to me to be the best lightweight and yet High-DPI friendly Desktop Environment, so that’s what I used. I trust you will be able to find the guides on how to install either with a quick Google search, so I will not go much further into detail here. To get into the boot menu, you need to press F7. After your installation is done most things are already working. Fixing Remaining Issues Out of the box, there are a few issues and things that do not work because they are missing drivers or similar. We’re getting started with the most important which is rotation. As you’ll need to enter a couple commands to get automatic rotation working, start off with manually rotating the screen by opening a terminal and run the command xrandr -o left Note: xrandr is part of xorg-xrandr, and you will need that package for autoration to work. There are a couple solution on how to rotate the screen out there, however I decided to go for the one with least overhead that looked the cleanest to me. First of all, compile the 2in1screen binary. The sourcecode can be found in this Repository. Download, compile it and push it to /usr/local/bin. Note: Make sure to install xorg-xrandr and xorg-xinput for this tool to work. Now configure the Desktop Manager to start it after login. LXDE: add /usr/local/bin/2in1screen & to /etc/lxdm/PostLogin LightDM: Place the screenrotate.sh in /etc/lightdm/screenrotate.sh and set display-setup-script in /etc/lightdm/lightdm.conf to display-setup-script /etc/lightdm/screenrotate.sh Reboot and make sure everything works as desired. The Hi10 Airs Silead touchscreen requires drivers that are not bundled with a Linux install. You can download them here: https://github.com/onitake/gsl-firmware/tree/master/firmware/linux See the Readme on how to install them. These drivers get loaded by the Linux kernel. I submitted a commit to add support for the Hi10 Air to the Linux Kernel and it has been approved. The commit is merged in the 5.1 (and newer) Kernel. That means you need to update your kernel for a proper touch support. If you previously used my Kernel you can go back to the official kernel by running: Now reboot and enjoy your touchscreen. If your Audio isn’t working, make sure to update the alsa-lib to Version 1.1.7 or above. On Arch that package is in the stable repos so a sudo pacman -Syu will be enough. Now, you probably already noticed, everything is a bit small to use your Fingers. As a browser I recommend Google Chrome as that has a great touchscreen UI already. For File browsing and reading I suggest using nautilus and evince because of their touch friendlyness. For the whole system, there is a few things you can improve: First of all, increase the general DPI. You can do so by adding Xft.dpi: 150 to /.Xresources . If the file doesn’t exist, create it. Next up a few additional tweaks for LXQt: First of all increase the Panel bar Rightclick on the Panel and Press «Configure Panel». Then set the Size to 50px and the Icon Size to 30px. Next up, Go to the Menu -> Preferences -> LXQt settings -> Appearance -> Font and set the DPI to 96 and finally go to Menu -> Preferences -> LXQt settings -> OpenBox Settings -> Font and increase the individual fonts to get a window title bar to drag/drop as well as hit the navigation with the finger. I set mine to Cantarell 16 and Cantarell 14. Another Handy feature I found myself in need of was an onscreen keyboard. For that I installed OnBoard, and found a very neat feature here: https://bugs.launchpad.net/onboard/+bug/1232107 You can map a button to open/close the keyboard. I set mine to Super L, which equals the left Windows button and the touch button on the tablet itself. In the LXQt Settings Menu you can configure Shortcut Keys. Create or edit the existing shortcut and either map the following DBus Call. DBus Call: Service: org.onboard.Onboard Path: /org/onboard/Onboard/Keyboard Interface: org.onboard.Onboard.Keyboard Method: ToggleVisible If your Desktop environment doesn’t support DBus calls, use the following command: Источник |
 brokerZIP, может вернете в характеристики (в шапке которые) Z8300 вместо Z8500? Везде в описании Z8300. А то народ будет путаться 🙂


