- grub2 загрузка windows_boot.iso
- Grub 2 (загрузка с *.iso и *.img)
- Загрузка с ISO образа в Grub
- Что нам понадобится
- Загрузка с ISO образа в Grub
- Загрузка windows с iso образа в Grub
- Завершение настройки Grub
- Выводы
- Ubuntu Documentation
- Introduction
- Downloading the ISO
- Downloading
- ISO File Location
- Storing the ISO
- Exploring the ISO Contents
- Archive Manager
- Command Line
- GRUB Terminal
- Creating the GRUB 2 Menuentry
- grml-rescueboot
- grub-n-iso_multiboot
- Make a USB pendrive that can boot (almost) all PCs
- Separate boot drive using ISO boot alias grub-n-iso from template
- Manually editing the GRUB files
- Menuentry Example
- Menuentry Details
- Booting the ISO
- Booting without a GRUB Menuentry
- Menuentry Troubleshooting
- Installing Ubuntu from a Menuentry Boot
- Example ISO Menuentries
- Alternatives to ISO Booting
grub2 загрузка windows_boot.iso
суть такова, есть образ загрузочного диска офтопика (xp.iso) на жестком (hd1,5), есть usb-флешка с grub2. подскажите как правильно прописать grub.cfg где-то нашел:
loopback loop (hd1,5)/xp.iso
выдает error: invalid file name «
гугл молчит, маны читал

> loopback loop (hd1,5)/xp.iso
что, уже и так можно? О_О
AFAIK, не один из существующих загрузчиков не умеют грузить образы с El Torito.
Те которые можно (с линуксом) имеют гибридный El Torito/Grub загрузчик.
> что, уже и так можно? О_О
можно, это grub2 =)
s/не один/ни один/
А, я винду с линупсом спутал. Там ядро и initrd вообще в отдельных строчках указываются.
Хотя нет.. я и адрес к iso как-то по-другому задавал. ой, не вспомню сейчас.

> chainloader (loop)
Гуглите дальше, там сказано, что загрузку с (loop) они ниасилили. Мне пришлось пользоваться memdisk от syslinux.
Более того, винда отвалится с BSOD 0x7b, ибо перейдёт в защищённый режим процессора и вся эмуляция диска пойдёт прахом.
>Мне пришлось пользоваться memdisk от syslinux.
И что, получилось загрузить любую isoшку таким способом?
Гуглите дальше, там сказано, что загрузку с (loop) они ниасилили
Ливцд-образы Линуксов, у которых была ядрёная опция isofrom, у меня успешно грузились таким макаром.
Вот пример: http://michael-prokop.at/blog/2009/05/25/boot-an-iso-via-grub2/
> Ливцд-образы Линуксов,
Именно. Там грузили с (loop) ядро и initrd. А человеку нужно загрузить загрузочный сектор ISO-образа, что разработчики GRUB2 ниасилили и посчитали ненужным.
И что, получилось загрузить любую isoшку таким способом?
Расковырял Frenzy, выложил запакованный образ файловой системы на флешку, остатки собрал обратно и запустил memdisk’ом. Работает.
> загрузить загрузочный сектор ISO-образа, что разработчики GRUB2 ниасилили и посчитали ненужным
Да, действительно, вы абсолютно правы
буду курить memdisk, хотя, насколько я понимаю, он тоже не панацея
Grub 2 (загрузка с *.iso и *.img)

На ubuntuforums попался рецепт, как с помощью Grub 2 загрузить компьютер с iso-образа, лежащего на винте. Это может быть удобно, когда нет привода в компьютере или просто лень диск записывать. Кроме того, что не нужно вставлять диск в привод, сам процесс загрузки проходит заметно быстрее. К сожалению, не все загрузочные образы подходят для такой загрузки. Умеют такой «фокус», например, Ubuntu 9.10 и новее, Gparted CD, Parted Live CD, SystemRescue CD и некоторые другие. Кроме *.iso возможна загрузка с некоторых *.img-образов.
В данном примере предлагается размещать файлы загрузочных образов в директорию /boot/iso/ и в Grub 2 указывать их как, например, (hd0,1)/boot/iso/ .
Поскольку ‘rescue CD‘ как правило грузятся в память компьютера, тип файловой системы, где лежат образы, не имеет большого значения. Ведь Grub 2 уже с него умеет загружаться.
После того как вы скопируете образы в /boot/iso/ , остаётся лишь прописать их в меню Grub 2.
Обратите внимание, если вы хотите загружать образы из домашней директории. У большинства пользователей /home — это отдельный раздел. Соответственно, необходимо указывать путь не в виде (hdA,B)/home/user/iso/name.iso , а примерно так: (hdX,Y)/user/iso/name.iso . Думаю, это понятно.
Итак, создаём нужные пункты в grub-меню. Открываем для правки файл /etc/grub.d/40_custom. Все добавленные в него записи появятся последними пунктами меню. Если вы хотите добавить записи выше, то нужно их писать в файл с меньшим номером, например — 06_custom . Главное, не забыть сделать его исполняемым.
После внесения любых изменений в этот файл необходимо выполнить команду:
Для загрузки с img -образов необходим файл memdisk. Он поставляется с пакетом syslinux. Последний обычно установлен в системе. Файл нужно скопировать в /boot . Для debian/ubuntu это будет выглядеть так:
Так же, процесс добавления img -образов можно автоматизировать, создав файл /etc/grub.d/50_memdisk со следующим кодом:
После чего, как уже писалось, необходимо выполнить:
Теперь, если мы поместим образы *.img в /boot/images , они автоматически появятся в меню загрузки.
Загрузка с ISO образа в Grub
Есть не так уж много вариантов использования нескольких дистрибутивов Linux на одной машине. Вы можете установить их все на жесткий диск, на виртуальную машину или сохранить в виде ISO образа и загружаться в реальном времени.
Первый и второй способы не очень выгодны так как требуют очень много места на жестком диске, с другой стороны, для третьего способа нужно иметь CD диск или USB флешку для хранения образа и загрузчика. Но есть еще один вариант — хранить ISO образ на жестком диске, и загружаться с него по мере надобности. Здесь не нужно столько дискового пространства как при установке, и не нужен внешний носитель информации. В этой статье будет рассмотрена загрузка с ISO образа в Grub.
Что нам понадобится
В этой статье мы будем использовать загрузчик Grub, впрочем, он и так используется в большинстве дистрибутивов Linux. Также нам понадобится ISO образ, с которого будем загружаться и вы должны знать на каком разделе он размещён. Удобнее всего разместить его на загрузочном разделе. Чтобы узнать какой раздел диска у вас загрузочный выполните:

Загрузочный раздел будет помечен знаком * в колонке Загрузочный или Boot. Например, у меня /dev/sda2 или как пишется в Grub hd0,2 — загрузочный.
Разделы /dev/sda1 и /dev/sdb3 будут называться в Grub hd0,1 и hd1,3 соответственно. В синтаксисе Grub именование дисков начинается с нуля, а именование разделов с единицы.
Загрузка с ISO образа в Grub
Сначала откройте файл /etc/default/grub и закомментируйте там эту строку если она там есть:
Перед строчкой должна стоять решетка. Сохраните изменения, а затем откройте файл /etc/grub.d/40_custom. Здесь мы добавим пункт для загрузки с образа, синтаксис выглядит следующим образом:
menuentry «Заголовок пункта» <
set isofile = «Адрес ISO файла»
loopback loop Раздел в форме записи Grub на котором расположен ISO $isofile
Параметры загрузки ядра
>
Перед тем, как переходить к настройке Grub надо выяснить ещё один момент. Как в оригинальном образе выполняется загрузка дистрибутива. Обычно в каждом загрузочном образе есть папка Grub в которой можно посмотреть файл grub.cfg или другой подобный, например loopback.cfg и узнать какими строками там загружается ядро:

Только перед путями к файлам надо добавить адрес (loop). Путь к образу надо указывать от начала того диска, на котором он расположен. Например, если диск расположен в корне загрузочного раздела, который монтируется в /boot, то и путь будет /файл.iso, а не /boot/файл.iso. Теперь можно переходить к примеру, запись для загрузки Puppy Linux будет выглядеть вот так:
menuentry «Puppy 20.04 Live» <
set isofile=»/puppylinux.iso»
loopback loop (hd0,2)$isofile
linux (loop)/vmlinuz pfix=fsck pmedia=cd findiso=»/puppylinux.iso»
initrd (loop)/initrd.gz
>

Каждый дистрибутив индивидуален и надо с каждым разбираться отдельно. Если вы хотите запускать Gparted:
menuentry «GParted Live amd64» <
set isofile=»/gparted-live-0.18.0-2-amd64.iso»
loopback loop (hd0,2)$isofile
loopback loop $isofile
linux (loop)/live/vmlinuz boot=live config union=aufs noswap noprompt ip=frommedia toram=filesystem.squashfs findiso=$
initrd (loop)/live/initrd.img
>
Или даже Fedora Linux:
menuentry «Fedora Live» <
set isofile=»/Fedora.iso»
loopback loop (hd0,2)$isofile
loopback loop $isofile
linux (loop)/isolinux/vmlinuz0 root=live:CDLABEL=Fedora-Live rootfstype=auto ro rd.live.image quiet rhgb rd.luks=0 rd.md=0 rd.dm=0 iso-scan/filename=$
initrd (loop)/isolinux/initrd0.img
>
Обратите внимание, что опции будут меняться в зависимости от дистрибутива и расположения в нем загрузочных файлов. Кроме того, важно то где размещен ISO образ, если ваш домашний каталог зашифрован лучше его хранить на загрузочном разделе, как в примерах выше.
Хотите больше? Можно загрузится с ISO для автоматического выполнения каких-либо действий. Например, если вы параноик и хотите иметь возможность быстро стереть свой жесткий диск можно использовать DBAN. Но будьте осторожны так как это сотрет все данные без возможности восстановления.
menuentry «Darik’s Boot and Nuke» <
set isofile=»/dban.iso»
loopback loop (hd0,1)$isofile
linux (loop)/dban.bzi nuke=»dwipe» silent
>
Есть еще много вещей, которые можно сделать с помощью загрузки ISO образа в Grub, неважно хотите ли вы очень быструю Live систему или иметь возможность уничтожить все кончиком пальца.
Загрузка windows с iso образа в Grub
Если вам нужна загрузка Windows с ISO образа Grub, то это делается тоже не очень сложно, но немного по другому. Сначала нужно скачать syslinux и извлечь оттуда memdisk в папку /boot/. Это должна быть папка, куда установлены файлы Grub. Дальше добавьте в конфигурационный файл 40-grub.conf такие строки:
menuentry «Boot Windows» <
search -f «—set-root /Windows.iso»
insmod memdisk
linux16 /boot/memdisk iso
initrd16 /Windows.iso
>
Образ Windows должен лежать в корне одного из разделов и называться Windows.iso, дальше команда search автоматически найдет этот раздел и установит его в качестве корня. Потом останется только загрузка windows с iso образа grub.
Завершение настройки Grub
Мы все подготовили, теперь остается обновить конфигурацию загрузчика Grub, чтобы новые пункты добавились в /boot/grub/grub.cfg и появились в меню загрузки. Для Ubuntu команда будет выглядеть вот так:
В других дистрибутивах может понадобится команда:
sudo grub-mkconfig -o /boot/grub/grub.cfg
Затем можно перезагрузиться и посмотреть что получилось:
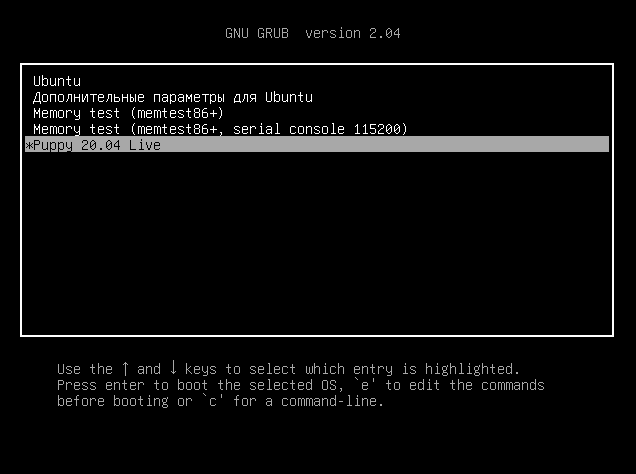
Если что-то пошло не так, вы можете нажать клавишу E и редактировать этот пункт меню чтобы попытаться исправить проблему прямо в загрузчике.
Выводы
Теперь вы знаете как выполняется загрузка iso образа grub, здесь нет ничего сложного, но зато это очень полезная возможность получить несколько систем на своем компьютере, затратив при этом минимум памяти и времени на их установки. Если у вас остались вопросы, спрашивайте в комментариях!
Ubuntu Documentation
Introduction
Ubuntu ISOs are designed to allow booting directly from the hard drive using GRUB 2 and eliminates the need for burning a CD/DVD. This feature permits the user to boot and use the «Try Ubuntu» feature of the Ubuntu installation CD as well as to install Ubuntu directly from an ISO on the hard drive. In addition to Ubuntu ISOs, many other Linux distributions as well as popular rescue CDs can be booted directly from an ISO file.
 In order to use this feature, GRUB 2 must already be installed on the system. GRUB Legacy can not use this feature.
All GRUB references on this page refer to GRUB 2 (version 1.97 or later) unless otherwise noted.
This guide will detail how to:
- Download and store Ubuntu ISOs
- Create a GRUB 2 menuentry for running the ISO directly from a file
- Install Ubuntu directly from an ISO file via the GRUB 2 menu
Additionally, examples of GRUB 2 menuentries for other operating system and utility CDs are provided on the Grub2/ISOBoot/Examples page.
Downloading the ISO
Downloading
The user should decide beforehand which ISO to download. The Desktop version is available in 32-bit and 64-bit versions. The 32-bit version (-i386) will run on a 64-bit computer, but a 64-bit version (-amd64) will not run on a 32-bit computer. There are also Server versions, as well as an Alternate CD version for users having special requirements or using RAID and/or LVM.
Ubuntu CD/DVDs can be downloaded from the official Ubuntu site: Ubuntu Download page. Links to installation help and alternative download sites are accessible from that page as well.
ISO File Location
The Ubuntu default download location is normally to the user’s Downloads folder, but the ISO may also appear on the Desktop or another location defined by the user. The Desktop version filename for officially released versions of Ubuntu uses the format of ubuntu-XX.XX-desktop-amd64.iso for the 64-bit version and ubuntu-XX.XX-desktop-i386.iso for the 32-bit version, with XX.XX being the release number (such as 12.04, 11.10, etc).
Storing the ISO
Once downloaded, the user must decide where to store the file. Typically, the ISO CD image is approximately 700 MB, while the DVD version is even larger. Storing it on a non-system partition should be considered if space is limited on the system (/) partition. Additionally, users making system backups might wish to exclude the folder in which the ISO is stored if the file remains on the system (/) partition.
For purposes of this guide, the ISO will be placed in the user’s Downloads folder (/home/username/Downloads).
Note: Storing the ISO file in /boot is not recommended if you are using a small, separate /boot partition.
- The ISO file may be stored on any partition accessible to GRUB 2. The partition format does not need to be ext3/4.
- If stored on a partition with a different format than the system, the filesystem’s module (ntfs, reiserfs, etc) may need to be included in the menuentry for GRUB to be able to access the file.
- The ISO can remain on the system partition (/) if desired.
If the system uses a separate partition for a system folder such as /home or /boot, the user must ensure to properly identify the location of the ISO in the menuentry’s PATH. In such cases, since the partition is directly mounted by GRUB 2, the address would not include /home or /boot.
Exploring the ISO Contents
There are several methods the user can employ to examine the contents of the ISO file. Viewing the folders and files contained in an ISO can help determine menuentry path designations and the names assigned to system folders and files. The two most important files contained on the ISO, for building the menuentry, are the kernel and the initrd image. These files reside in the casper folder on a standard Ubuntu ISO. The kernel link is vmlinuz and the image file is initrd.img.
On other bootable Linux ISOs and utility CDs, these files may be located in other folders and may be named differently (vmlinuz0, initramfs, etc). Note that some non-Ubuntu ISOs contain an initrd image with a .gz extension rather than the .lz extension now used by Ubuntu.
Archive Manager
Archive Manager/File Roller is a GUI application which can inspect the contents of an ISO file. Archive Manager can be started in the following ways:
- In Nautilus, right click the ISO and select «Open with Archive Manager».
- Via the DASH Home button (top left of screen). Type «Archive Manager» and press ENTER.
Via terminal using file-roller or gksu file-roller
Command Line
The user can mount the ISO image via a terminal and then inspect the contents via commands or opening a file browser. To mount the ISO via the terminal:
- Boot into your normal Linux operating system.
- Create a specific mount point, if desired. An existing mount point may also be used.
- Mount the ISO
Example: sudo mount -o loop /home/username/Downloads/ubuntu-desktop-amd64.iso /mnt/iso/
GRUB Terminal
GRUB 2’s terminal operations permit exploring the contents of partitions and ISO images. The following GRUB commands may be helpful if an error message is generated after attempting to boot an ISO menuentry:
Display partitions known to GRUB.
Display the contents of the / folder on /dev/sdXY
To mount an ISO via the GRUB terminal, determine the location/path of the ISO file, then:
loopback loop (hdX,Y)/
Example: loopback loop (hd0,5)/my_isos/ubuntu-12.04-desktop-amd64.iso
Once mounted via the above command, the ISO can be inspected using the ls command. The ISO will be mounted on «(loop)».
ls (loop)/casper
On an Ubuntu ISO, this should display vmlinuz and initrd.img, among other files.
Creating the GRUB 2 Menuentry
There are several methods to create a GRUB 2 menuentry which will boot an Ubuntu ISO. Two options are provided below — using the grml-rescueboot package to automatically create the menuentry, or manually editing the GRUB 2 configuration scripts/files.
There is also a method to create USB [multi]boot pendrives (almost) automatically, grub-n-iso_multiboot.
grml-rescueboot
A very simple way of creating a GRUB menuentry for a bootable ISO file is to use grml-rescueboot.
The package does the following:
- Creates a /boot/grml folder.
Automatically adds menuentries to the GRUB menu for any ISO files located in the /boot/grml folder. This is accomplished whenever the update-grub command is executed.
To use the grml-rescueboot option:
Place bootable ISO files in the /boot/grml folder.
- Since this is a system folder, the operation must be conducted as «root». For example, if the ISO is located in the user’s Downloads folder, the command would be:
grub-n-iso_multiboot
A simple way to create a USB [multi]boot drive including the grub bootloader and the GRUB menuentries for Ubuntu ISO files is to use grub-n-iso_multiboot with the shell-script file mk-grub-n-iso. It does the main part of the work automatically with the help of a couple of files for the configuration of the booting system.
The shell-script is made to be easy to use, but it helps if you have some experience with terminal windows and command lines.
Make a USB pendrive that can boot (almost) all PCs
It is possible to create the pendrive in either UEFI mode or BIOS mode, and the two grub installations are simply done with two different command lines.
This tool works in an Ubuntu family operating system of version 14.04 LTS or newer. (It is possible to use Ubuntu 12.04 LTS too, but it has an older version of grub, and this method works only for BIOS mode.)
64-bit versions work only in 64-bit computers. 32-bit versions work in 32-bit and 64-bit computer with BIOS, and now also with UEFI. It is possible to create ‘grub-n-iso’ pendrives that boot most PCs with Intel and AMD processors according to the following links,
The pendrive ‘behind’ the following grub menu was created with the command line
using links in the directory ‘grub-n-iso_multiboot’ to the target iso files. The only manual tasks were to answer a few questions (one-character replies), and the use gparted to edit partitions according to guidelines by the script itself (partition sizes, file system types: fat32 and ext2).

Separate boot drive using ISO boot alias grub-n-iso from template
It is rather easy to create a separate (USB) boot drive using ISO boot alias grub-n-iso from a template. This can be used
- directly with or without persistence ‘basic method’, but also
- to create a multiboot drive for example as a demo drive with all Ubuntu family flavours, or
- to create an installed system, that can boot both in UEFI and BIOS mode (alias CSM alias legacy mode).
The ‘basic method’ is described at the following link, ../../Installation/iso2usb/isoboot

Manually editing the GRUB files
Another way to create a GRUB menuentry is to add it to the /etc/grub.d/40_custom file. Add the menuentry below the existing lines in the file.
- Open the /etc/grub.d/40_custom file as root with a text editor.
- Add the menuentry.
- Save the file.
Update the GRUB 2 menu (the file /boot/grub/grub.cfg) with update-grub
Menuentry Example
The following is an example GRUB menuentry for Ubuntu 12.04’s 64-bit ISO, located in the user’s Downloads folder of sda5.
Updated releases of Ubuntu 12.04 and later may designate the 64-bit kernel as vmlinuz.efi. This file is still located in the /casper folder. When creating the menuentry, use vmlinuz.efi rather than vmlinuz in the linux line for the 64-bit version.
For the 64-bit version of Ubuntu 12.04 (update 2):
For Ubuntu 20.04 LTS and booting with grub 2.04
Generally, when booting with »’grub 2.04»’ in UEFI mode you need an extra command to remove tpm.
Menuentry Details
The menuentry constructed above is built with the following considerations.
- menuentry
The menuentry title (between the quotations) is determined by the user. Any title can be used. The line must end with <
set isofile
- Designating an ‘isofile’ variable is not required but simplifies the creation of multiple Ubuntu ISO menuentries. By using this convention, the user can copy an existing ISO menuentry and, if the ISO is located in the same folder, simply change the menuentry title and the name of the ISO file on this line. No other changes are necessary.
The set isofile line should reflect the exact name of the ISO file
loopback
- X is the drive number, starting with 0; Y is the partition number, starting with 1
- sda5 would be designated as (hd0,5); sdb1 would be (hd1,1)
- If no messages are displayed after pressing ENTER the command ran successfully.
- You can return to the main menu at any time by pressing ESC.
- Verify the filename is typed correctly.
- Ensure the proper path is used.
- At the Grub prompt, the user can explore both the partitions and the ISO file itself.
- At the Grub prompt, the user can explore both the partitions and the ISO file itself.
The loopback line must reflect the actual location of the ISO file. In the example, the ISO file is stored in the user’s Downloads folder.
Other Location Examples:
(hd0,5)/boot/$isofile
Located in the system’s normal /boot partition on sda5
(hd0,6)/$isofile
Located in a separate boot partition on sda6
(hd0,7)/username/Downloads/$isofile
Located in a separate home partition on sda7
(hd1,2)/iso/$isofile
Located in the /iso folder of the sdb2 data partition
This line is specific to the Ubuntu family of ISOs. Other Linux distributions and system ISOs may use different filenames, folders and switches to boot their ISOs. Check the Grub2/ISOBoot/Examples page to see if an example exists. The user can also mount the ISO and explore its contents to ensure the menuentry contains the correct filenames and paths.
initrd
See the linux line notes. Additionally, some other systems use initrd.gz rather than initrd.lz on their ISOs.
If the ISO is stored on a partition formatted differently than your main operating system, it may be necessary to load the module for the specific format before GRUB can access it. In this case, add the following line immediately after the menuentry line for the desired format (ntfs, reiserfs, etc). It should not be necessary, but if GRUB cannot read the ISO the iso9660 module can also be loaded:
insmod ntfs
insmod iso9660
For more information on creating a custom menuentry, please visit Grub2/CustomMenus.
Booting the ISO
Once the menuentry has been created and GRUB 2 updated, the ISO entry will appear on the GRUB menu during boot. If the entry was created in the /etc/grub.d/40_custom file, it will appear after the Ubuntu and other OS listings on the main GRUB menu.
To boot the ISO, highlight the entry and press ENTER or F10.
If the menuentry was created using grml-rescueboot, once the ISO is selected from the menuentry additional options such as «Try Me» or «Install» will be presented before booting.
Booting without a GRUB Menuentry
Although GRUB 2 must be installed and working, it is not required to have a menuentry in order to boot the ISO. Booting can be accomplished from the GRUB prompt by manually typing in each command in the menuentry example (except the menuentry title line).
- To access the GRUB prompt, type ‘c’ while the GRUB menu is displayed.
Manually type each line (except the menuentry line) and press ENTER.
After entering the final line, type boot and ENTER.
Booting via this method is not persistent. The commands need to be entered on each subsequent boot until a menuentry is created in the GRUB menu.
Menuentry Troubleshooting
There are a variety of reasons why a menuentry may fail to boot the ISO. Since the Ubuntu ISOs are standardized, the most likely reason is an incorrect path in one of the menuentry lines. Another likely problem is mistyping the ISO filename — for instance using a — rather than a _ or using the wrong version number.
The following steps may help identify the problem:
Type «ls (hdX,Y)/» or «ls (hdX,Y)/
» to inspect the contents of a partition or folder.
Mount the ISO using the «loopback loop» entry and then explore the contents using «ls (loop)/».
Alternatively, you can explore the ISO contents from a running system via the methods detailed in the Exploring_the_ISO_Contents section of this guide.
Do not use ‘curly quotes’ or leave extra spaces in the entries.
Try typing the menuentry (except the title line) manually at the Grub prompt and watch for error messages which may help pinpoint the problem.
If the ISO begins to boot but crashes or halts midway through the boot, the initrd image may not be found or one of the linux line kernel options may be incorrect.
For non-Ubuntu entries the switches on the linux line can be quite complicated. If there is no available example, search forums or the application’s web site for working examples.
Installing Ubuntu from a Menuentry Boot
Installation onto your hard drive is possible from a booted ISO file. A CD/DVD is not required. An Internet connection is recommended but not required. Without a connection packages installed from the ISO will not be updated and additional packages which may be necessary, such as video drivers, can not be downloaded. An Internet connection should be available after booting the ISO file from the GRUB menu.
To Install Ubuntu from an ISO Menuentry, use the procedures previously discussed to:
- Download the appropriate ISO.
- Move it to the desired location.
- Create the GRUB 2 menuentry and update the GRUB configuration file.
- Boot the ISO from the GRUB menu.
Note: If you have a large amount of RAM you may be able to use the toram option. This will allow the system to boot into memory and permit automatic unmounting of the isodevice during the installation. If you would like to try this option:
Press ‘e’ to edit the menuentry and add toram to the end of the menuentry’s linux line:
linux /casper/vmlinuz boot=casper iso-scan/filename=/ noprompt noeject toram —
Since edits to the menuentry are not persistent, if the toram option fails, simply reboot and use the existing menuentry without editing it.
Once booted to the Ubuntu LiveCD desktop:
The /isodevice must be unmounted for a successful installation. If /isodevice cannot be unmounted by the installer, the installation will fail unless the user forces its unmounting.
If the toram option was not used or was unsuccessful, unmount /isodevice:
- Open a terminal and run the following command:
- Start the installation procedure by double-clicking the «Install Ubuntu» icon.
Example ISO Menuentries
GRUB 2 can boot the ISOs of many Linux operating systems and rescue CDs if they were built with this capability. The filenames, locations and kernel options vary widely and it can be difficult to determine the exact commands necessary to boot these ISOs.
An Examples page has been created to allow Ubuntu contributors to provide known, working menuentries for the ISOs of popular Linux and utility discs.
If an example of a desired ISO is not listed, the user may be able to determine the proper menuentry commands by comparing the file structure of the ISO with the menuentry commands of ISOs laid out in a similar fashion. Mounting the ISO as detailed in the Exploring_the_ISO_Contents section of this guide may help determine the proper entries.
Additionally, the user can search the Internet for menuentry examples or seek advice in forums specializing in the specific OS or utility.
Alternatives to ISO Booting
In addition to booting directly from an ISO menuentry or a bootable CD/DVD, there are also applications which can install the contents of an ISO onto the user’s hard drive. These utilities copy the necessary system files into a folder on the partition designated by the user and can create a menuentry to access these files.
One such utility compatible with Ubuntu is UNetbootin. UNetbootin is available via the Ubuntu repositories and Launchpad. Once UNetbootin extracts/installs the ISO files of an operating system or utility it generates a new item in the GRUB 2 menu.


