- How to Disable Test Mode in Windows 10
- Fix- Remove Test Mode message using Command Prompt-
- How to disable the «Test mode» message that is displayed in Windows
- Symptoms
- Windows 7
- Cause
- Resolution
- Как отключить Тестовый режим в Windows 10 (Test Mode)
- Как включить или отключить Тестовый режим в Windows 10
- Включение тестового режима в Windows 10
- Включаем тестовый режим
- Убираем надпись «Тестовый режим»
- Что делать, если «Тестовый режим» не включается
- About Test Mode and Disable Driver Signature Enforcement
- Some modified drivers lack a valid driver signature and this prevents them from being installed on a 64-bit Windows OS. To bypass this restriction and be able to install those drivers you need to run Windows in Test Mode or boot Windows with «Disable driver signature enforcement» option. These methods are only needed for x64 versions of Windows Vista, Windows 7, Windows 8, Windows 8.1, Windows 10, Windows Server 2008, Windows Server 2012, Windows Server 2016 and Windows Server 2019.
- 1. Test Mode method
- How to enable Test Mode
- How to hide/remove the Test Mode watermark from desktop when Test Mode is enabled
- How to disable Test Mode
- 2. Disable Driver Signature Enforcement method
- How to disable driver signature enforcement on Windows Vista, Windows 7, Windows Server 2008
- How to disable driver signature enforcement on Windows 8/8.1, Windows 10, Windows Server 2012/2016/2019
How to Disable Test Mode in Windows 10
August 28, 2020 By Sambit Koley
Some Windows 10 users have complained about an issue of seeing an annoying ‘Test Mode‘ message on their desktop. If you are seeing a similar message on your computer, don’t worry. In a few steps, you can remove the text message from your desktop.
Fix- Remove Test Mode message using Command Prompt-
To remove the text from your desktop screen all you have is to pass a single command through PowerShell or Command Prompt.
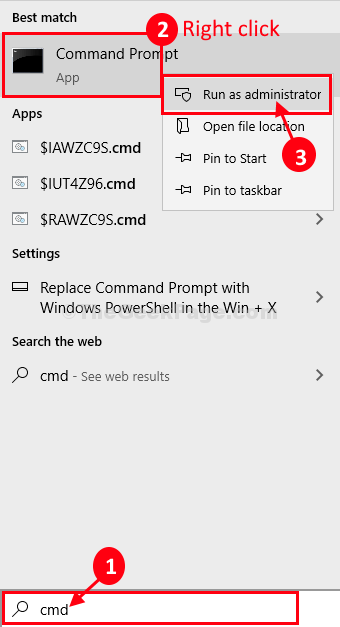
1. What you need to do is to click on the Windows icon and type “cmd“.
2. Then, right-click on “Command Prompt” in the elevated search result and choose “Run as administrator“.
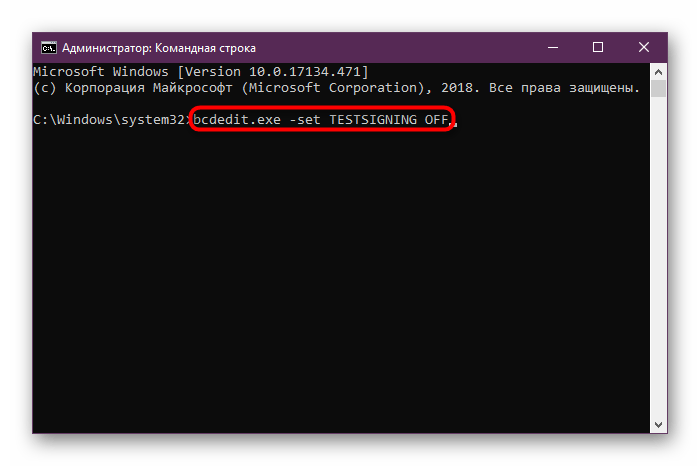
3. To switch the test signing mode ‘Off‘, copy-paste this simple command and hit Enter to execute it in the terminal.
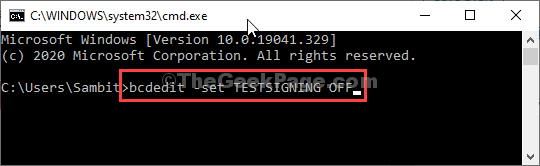
When you see the confirmation message “The operation was completed successfully“, close Command Prompt window.
Now restart your computer to complete the process.
That’s it! The ‘Test Mode’ text will not bother you anymore.

Sambit is a Mechanical Engineer By qualification who loves to write about Windows 10 and solutions to weirdest possible problems.
How to disable the «Test mode» message that is displayed in Windows
Symptoms
When you start your Windows 8-based or Windows 7-based computer, you receive the following message in the lower-right corner of the desktop, depending on your version of Windows.
Test mode Windows 8.1 build 9490
Test mode Windows 8 build 9200
Windows 7
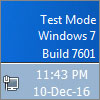
Test mode Windows 7 build 7600Note This message may also mention a more specific edition of Windows. For example, the message may be, “Test mode Windows 8 Pro build 9200.”
Cause
This message is displayed because your computer is running in test mode. (For more information, go to the «More Information» section.)
Resolution
To fix this problem manually in Windows 8, follow these steps:
Swipe in from the right, click or tap Search, and then type cmd. Alternatively, type cmd on the Start screen.
Tap-and-hold or right-click Command Prompt in the search results. Select Run as administrator on the menu that appears at the bottom of the screen.
Note If you are prompted by a User Account Control window, tap or click Yes.
In the Command Prompt window, type the following command, and then press Enter:
bcdedit -set TESTSIGNING OFF
After you see the confirmation, close the Command Prompt window.
Save any unsaved work, and then restart the computer.
To fix this problem manually in Windows 7, try these methods, in the given order.
Click Start, and then type cmd in the Search box.
Under Programs, right-click cmd.exe, and then click Run as administrator.
At the command prompt, type the following text, and then press Enter:
bcdedit /set TESTSIGNING OFF
Close the Command Prompt window, and then restart your computer.
Note If this method does not resolve the issue, go to Method 2.
Click Start, and then type cmd in the Search box.
Under Programs, right-click cmd.exe, and then click Run as administrator.
At the command prompt, type the following commands, and press Enter after each command:
bcdedit.exe -set loadoptions ENABLE_INTEGRITY_CHECKS bcdedit.exe -set TESTSIGNING OFF
Close the Command Prompt window, and then restart your computer.
The test mode message indicates that the test signing mode of the operating system is started on the computer. The test signing mode may start if an installed program is in a test phase because it uses drivers that are not digitally signed by Microsoft.
Microsoft added test mode to Windows so that users can test programs without having to provide an authentication certificate.
Как отключить Тестовый режим в Windows 10 (Test Mode)
В Windows 10 все больше и больше уделяют мерам безопасности, чтобы защитить пользователя от различных угроз, от сбоя установленных программ. Одним с таких новшеств стала функция Secure Boot UEFI-систем, которая запрещает установку неподписанных драйверов в операционной системе таким образом, что только могли установить те, которые ранее были одобрены в компании. К счастью для пользователей, которым нужно по особым причинам установить определенный, неподписанный драйвер, имеется функция Тестовый режим Windows 10.
Тестовый режим Windows 10 — это специальный режим работы, с помощью которого пользователи могут установить неподписанные драйвера и запустить программное обеспечение без цифровой подписи от Microsoft. Этот режим хорош тем, что можно запустить тот или иной драйвер и посмотреть последствия на систему без каких либо рисков. При включении Test Mode у вас появится на экране водяной знак, но что делать, если он включился сам? И как отключить тестовый режим в Windows 10.
Как включить или отключить Тестовый режим в Windows 10
Важно:
- Помните, что при выключении тестового режима, функция может заставить не правильно работать драйвер или программу.
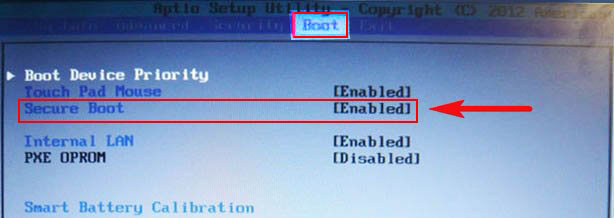
- Имейте в виду, если у вас включен в БИОСЕ Secure Boot, мы не сможем включить его вручную. ( Зайдите в БИОС и поищите функцию Secure Boot, при необходимости отключите ее. Обычно по умолчанию она выключена и можете не переживать).

- Если он сработал автоматически и на экране появился водяной знак Test Mode и вам нужно просто отключить тестовый режим, переходите сразу к шагу 4.
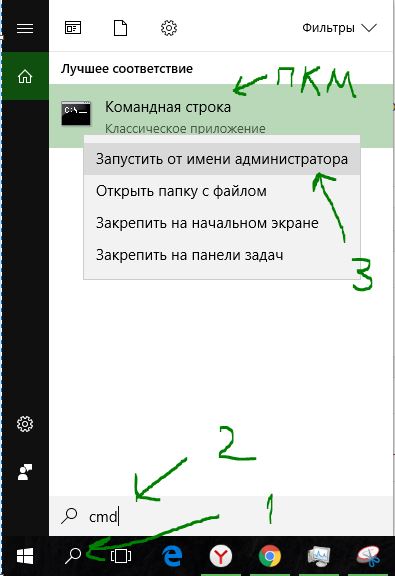
Шаг 1. Запустите командную строку от имени администратора:
- Нажмите Поиск.
- Введите cmd.
- Нажмите правой кнопкой мыши на Командная строка и запуск от имени администратора.
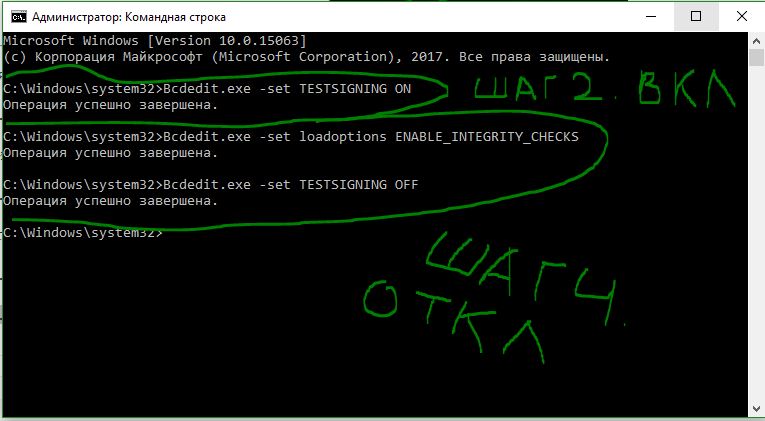
Шаг 2. Для включения режима тестирования введите следующие команды:
- Bcdedit.exe -set TESTSIGNING ON
Шаг 3. Чтобы отключить тестовый режим в windows 10 введите:
- Bcdedit.exe -set TESTSIGNING OFF
Шаг 4. Если шаг 3 не помог, то попробуйте ввести эти команды для отключения:
- Bcdedit.exe -set loadoptions ENABLE_INTEGRITY_CHECKS
- Bcdedit.exe -set TESTSIGNING OFF
Перезагрузите ваш компьютер или ноутбук.
Включение тестового режима в Windows 10

Важно! Для активации описываемой функции необходима учётная запись с правами администратора!
Включаем тестовый режим
Режим работы драйверов без подписи можно активировать следующим образом:
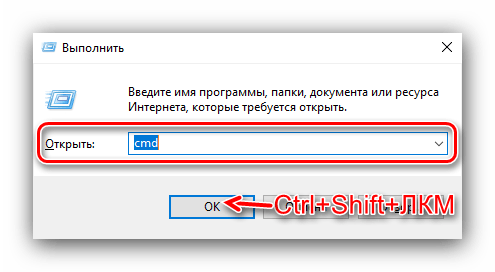
- Нужно запустить «Командную строку» с администраторскими привилегиями. Сделать это можно посредством утилиты «Выполнить»: воспользуйтесь сочетанием клавиш Win+R, затем введите в окне средства запрос cmd , зажмите Ctrl+Shift и кликните левой кнопкой мыши по элементу «ОК».
Читайте также: Запуск «Командной строки» от имени администратора в Windows 10
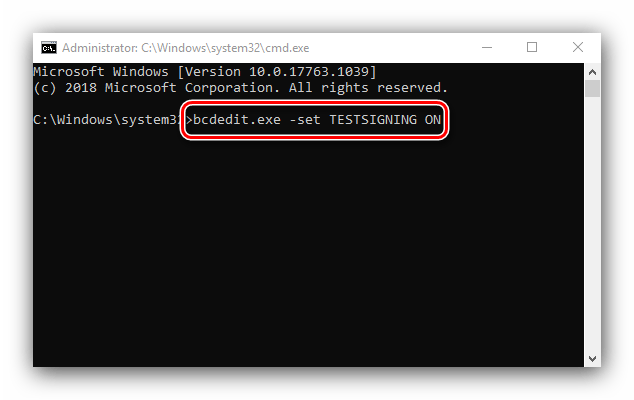
После открытия интерфейса ввода команд впишите в нём следующее:
bcdedit.exe -set TESTSIGNING ON
Проверьте правильность ввода и нажмите Enter.
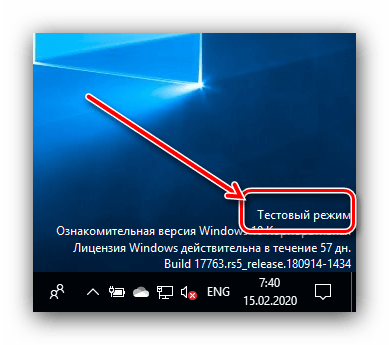
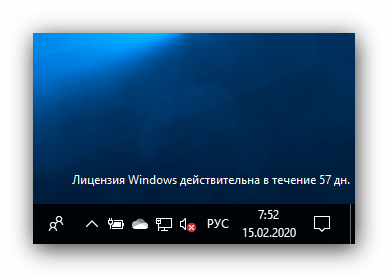
Перезагрузите компьютер. Если после этого в правом нижнем углу вы видите надпись как на изображении ниже – всё получилось, соответствующий режим активирован.
Если вы пользовались этим режимом временно, после выполнения необходимых манипуляций его желательно отключить. Процедура описана нашим автором в отдельном руководстве.
Убираем надпись «Тестовый режим»
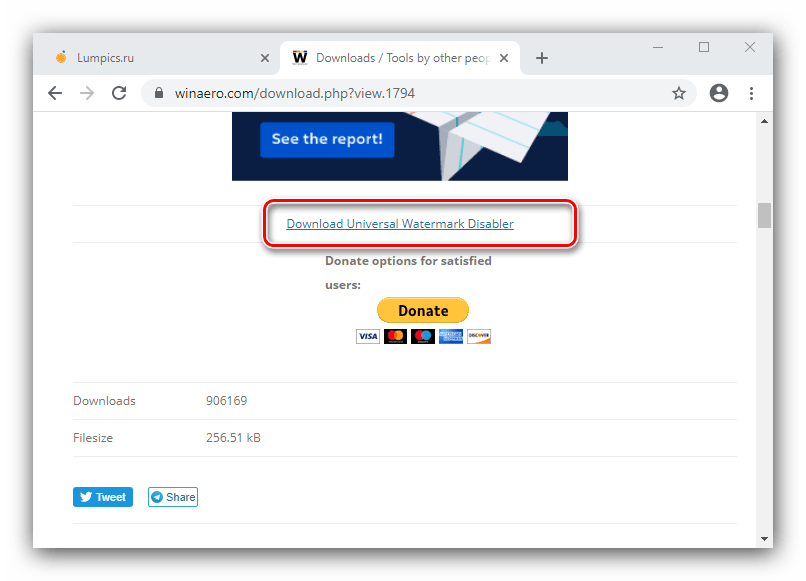
Некоторым пользователям (например, разработчикам-энтузиастам) необходимо, чтобы «Тестовый режим» был активен постоянно. Соответствующая надпись может раздражать, поэтому многие хотели бы от неё избавиться. Такая возможность есть, но для этого понадобится воспользоваться сторонним софтом. Мы будем описывать процедуру скрытия на примере Universal Watermark Disabler.
- Загрузите исполняемый файл утилиты по ссылке выше.
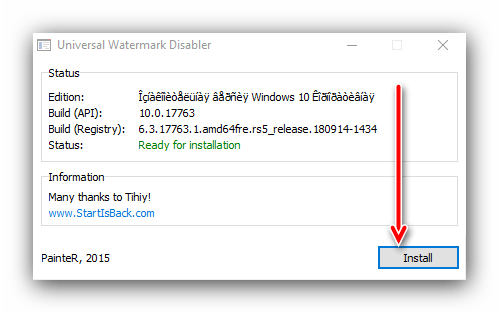
После скачивания запустите его. В окне программы нажмите «Install».
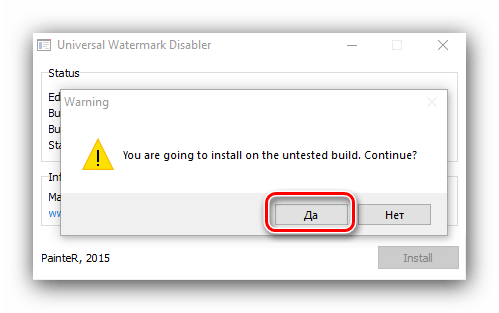
Может появиться окно с предупреждением о том, что работа средства не тестировалась на вашей сборке. Нажмите в нём «Да».
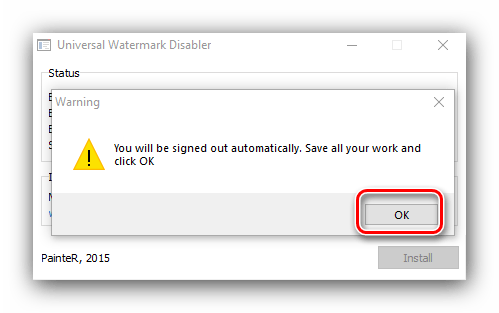
После непродолжительного времени появится новое окно с предупреждением о том, что вы будете автоматически разлогинены – это требуется для принятия изменений. Закройте все открытые программы, после чего кликните «ОК».
Войдите в свою учётную запись и подождите, пока прогрузятся элементы «Рабочего стола». Далее взгляните на правый нижний угол – надпись должна пропасть.
Таким нехитрым образом можно убрать практически любые системные надписи. Однако стоит иметь в виду, что на некоторых специфических вариантах «десятки» (например, с внесёнными на уровне сборки изменениями) рассматриваемое приложение может и не заработать.
Что делать, если «Тестовый режим» не включается
Иногда происходит сбой и рассматриваемый режим отказывается активироваться. В такой ситуации действовать необходимо следующим образом:
- Владельцам новейших компьютеров и ноутбуков может потребоваться отключить функцию Secure Boot в микропрограмме платы.
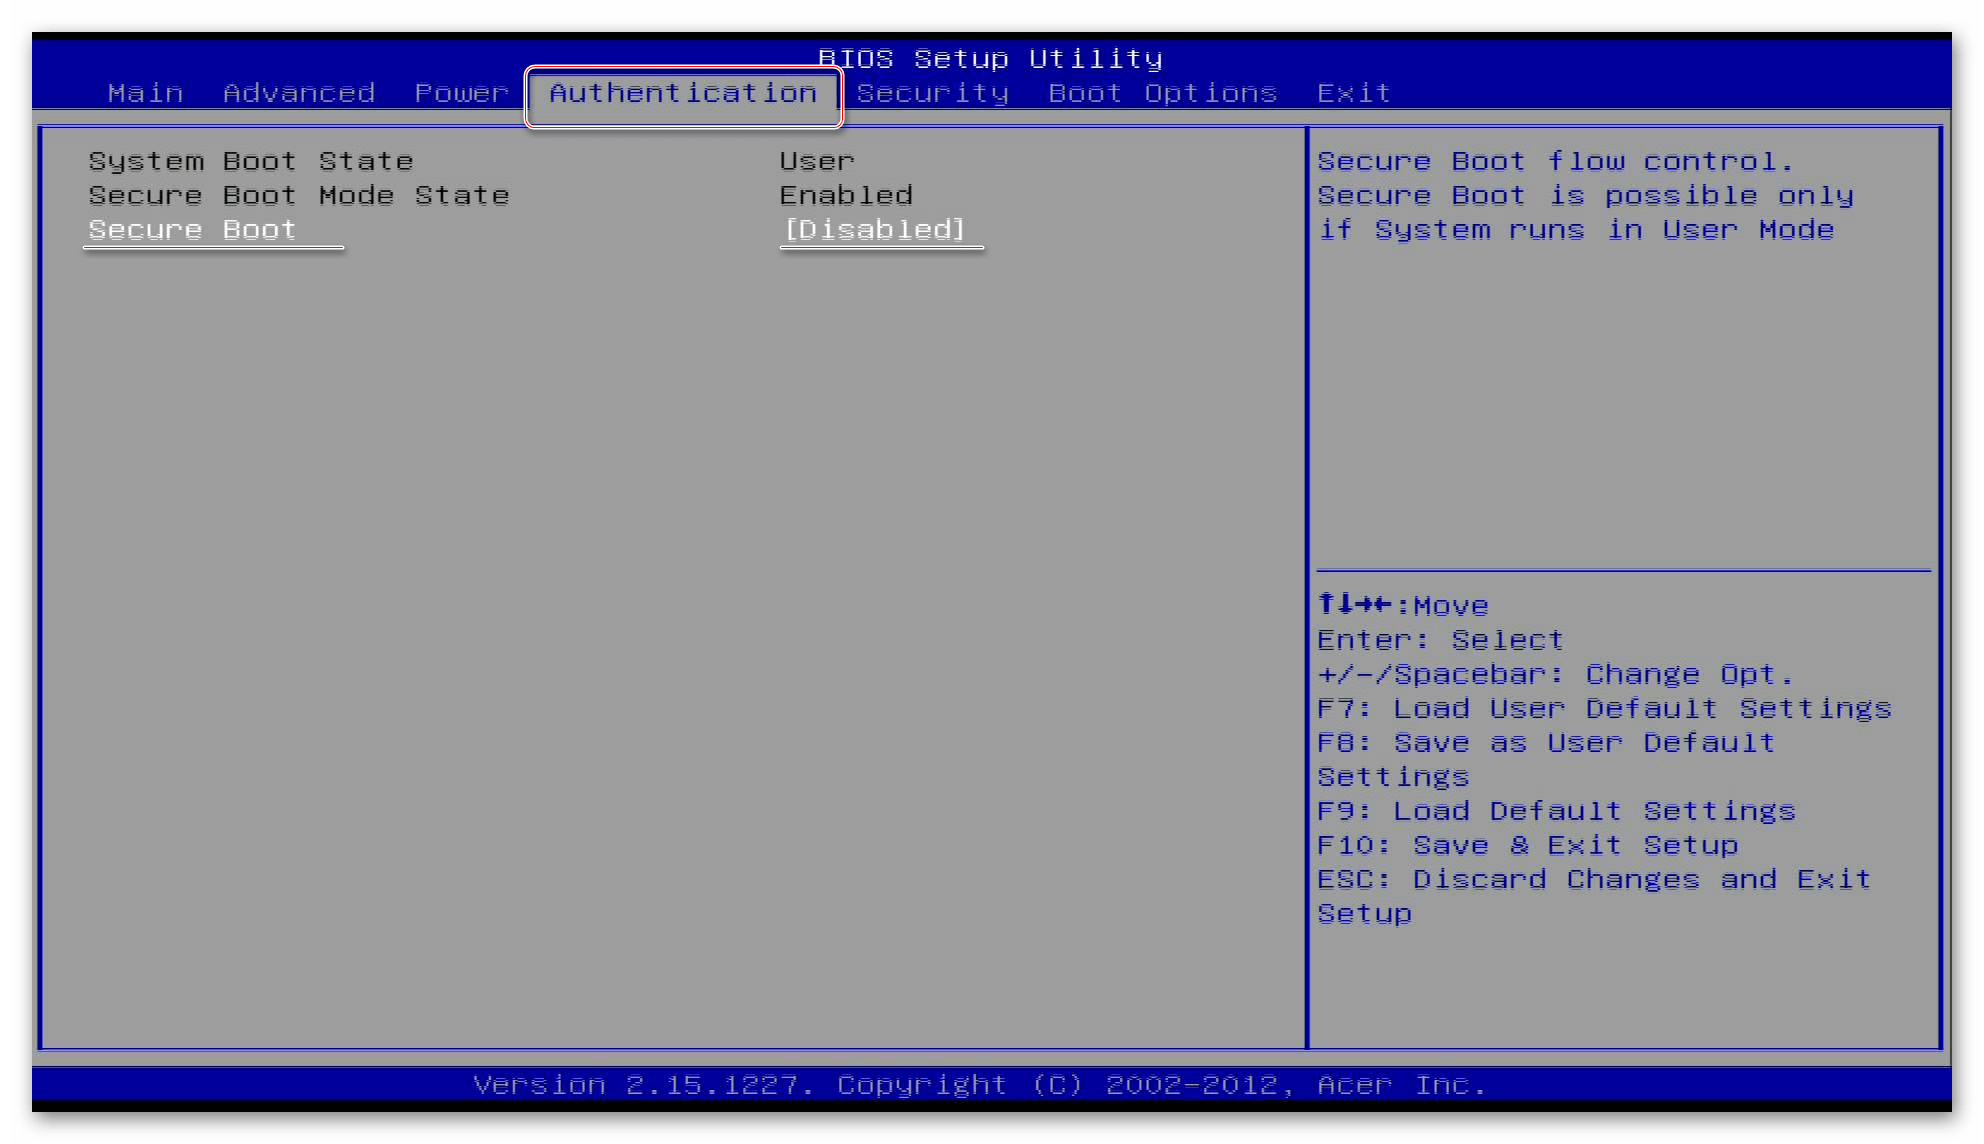
Урок: Как отключить UEFI в BIOS
Если Secure Boot отключен, но «Тестовый режим» по-прежнему не включается, повторите шаг 1 основной инструкции, но первой введите следующую команду:
bcdedit.exe -set loadoptions DISABLE_INTEGRITY_CHECKS
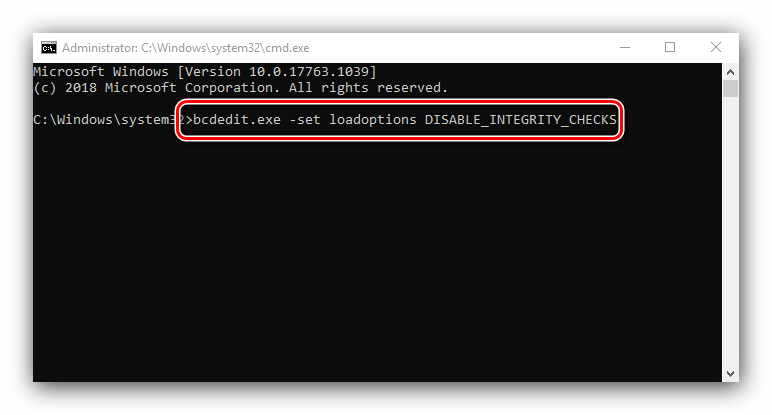
Затем введите код включения «Тестового режима», после чего перезагрузите компьютер – проблема должна быть устранена.
Таким образом, мы рассказали вам о том, как включить «Тестовый режим» в Windows 10, а также рассмотрели метод скрытия соответствующей надписи и решении в случае, когда этот режим не активируется.
About Test Mode and Disable Driver Signature Enforcement
22 Feb 2017 8:59am at May 17, 2020 • by CarvedInside • in Articles • 25
Some modified drivers lack a valid driver signature and this prevents them from being installed on a 64-bit Windows OS. To bypass this restriction and be able to install those drivers you need to run Windows in Test Mode or boot Windows with «Disable driver signature enforcement» option. These methods are only needed for x64 versions of Windows Vista, Windows 7, Windows 8, Windows 8.1, Windows 10, Windows Server 2008, Windows Server 2012, Windows Server 2016 and Windows Server 2019.
Contents
Page updates and announcements:
- 05 Apr 2020: Updated Test Mode batch files to v2.0, now they don’t require to be launched with «Run as administrator» right click option and their window will show if errors occurred.
1. Test Mode method
How to enable Test Mode
Download and run enable_testmode_v2.0.bat file. Restart PC.
[or]
Press Start->Search->type cmd then right-click on the result and click Run as administrator. In the CMD window type or copy-paste bcdedit /set testsigning on and press enter. Restart PC.
How to hide/remove the Test Mode watermark from desktop when Test Mode is enabled
If test mode is enabled you will have a text watermark on the desktop. To hide it:
- For Windows Vista/7 download this tool and check this guide on how to remove the TestMode watermark from the desktop.
- For Windows 8/8.1/10 download this tool.
How to disable Test Mode
Note: If you disable test mode while you have drivers installed that need test mode(unsigned drivers) those drivers will stop functioning.
Download and run disable_testmode_v2.0.bat file. Restart PC.
[or]
Press Start->Search->type cmd then right-click on it and click Run as administrator. In the CMD window type or copy-paste bcdedit /set testsigning off and press enter. Restart PC.
2. Disable Driver Signature Enforcement method
You could try this method if you don’t want Windows to always run in Test Mode. Compared to always running Windows in Test Mode, the «Disable driver signature enforcement» method needs to be applied each time you install a new driver that is unsigned.
How to disable driver signature enforcement on Windows Vista, Windows 7, Windows Server 2008
- Restart PC
- Press F8 repeatedly just after UEFI/BIOS initialization and before Windows would load
- Select «Disable driver signature enforcement» option.
- Install drivers. After you restart your system again you won’t be able to install unsigned drivers until you repeat the steps 1-3.
How to disable driver signature enforcement on Windows 8/8.1, Windows 10, Windows Server 2012/2016/2019
- In Windows go to PC settings (you can search for it in Start).
- Click on «Update & recovery» on the left side.
- Click on «Recovery» on the left side.
- Click «Restart Now» button under Advanced startup.
- Select Troubleshoot ->Advanced setup -> Startup Settings and press Restart
- Press 7 number key corresponding to «Disable driver signature enforcement» entry.
- Install drivers. After you restart your system again you won’t be able to install unsigned drivers until you repeat the steps 1-6.
Notes about «Disable driver signature enforcement»
There is a small chance that drivers installed using this method might stop working after some time requiring another install. Causes for this are unknown.
Drivers previously installed with this method can be reinstalled without booting with «Disable driver signature enforcement» if they are not uninstalled prior to the reinstallation.
On Windows 7, there might be cases where this method will not allow those drivers to load once Windows is booted normally. If you have this problem, let me know in the comments.


