- Как установить Android SDK на Windows, Mac и Linux
- Ручная установка
- Установка компонентов
- Ссылки
- Установка Android SDK в Linux
- Установка Java JDK
- Установка Android SDK
- Установка Eclipse
- Установка ADT
- How To Install Android SDK Tools On Ubuntu 20.04
- Download SDK Tools
- Install SDK Tools
- Download and Install Platform Tools
- Configure Environment Variable
- Using the SDK Manager
- Using the Emulator and AVD Manager
- Summary
Как установить Android SDK на Windows, Mac и Linux
22 октября 2008 года в Android появился магазин приложений Play Market. С тех пор прошло больше 10 лет и сегодня Google Play насчитывает почти 3 миллиона приложений в их числе Telegram с каналом AndroidInsider. Как же разработчикам со всего мира удается создавать качественные продукты? Они используют Android SDK. Чтобы получить все инструменты и средства разработки приложений, необходимо скачать среду разработки Android Studio. Но что, если вы хотите воспользоваться Android SDK с командной строкой без Android Studio и ненужных средств? В этом материале мы подскажем, как правильно установить и настроить Software Development Kit.

Ручная установка
Переходим по этой ссылке, находим раздел «Command line tools only» и скачиваем нужную версию в зависимости от вашей системы.
Создайте папку Android в корневой папке системы. В случае с Windows это локальный диск «С», а в OS X и Linux — домашняя папка пользователя. Распакуйте скачанный архив в папку Android. Для дальнейшей работы необходим установленный пакет Java на компьютере. OS X из коробки его поддерживает, чтобы проверить это, в терминале вбейте «which java», система должна выдать расположение пакета. На Windows и Linux устанавливаем JDK по этой ссылке.
Если вы используете Linux, вам понадобится установить еще несколько пакетов с помощью этой команды «sudo apt-get install lib32ncurses5 lib32stdc++6». Для других версий Linux необходимо найти подходящие пакеты ncurses5 и stdc++6.
Установка компонентов
Переходим в папку «Android/bin», находим исполняемый файл sdkmanager и запускаем, откроется следующее окно:
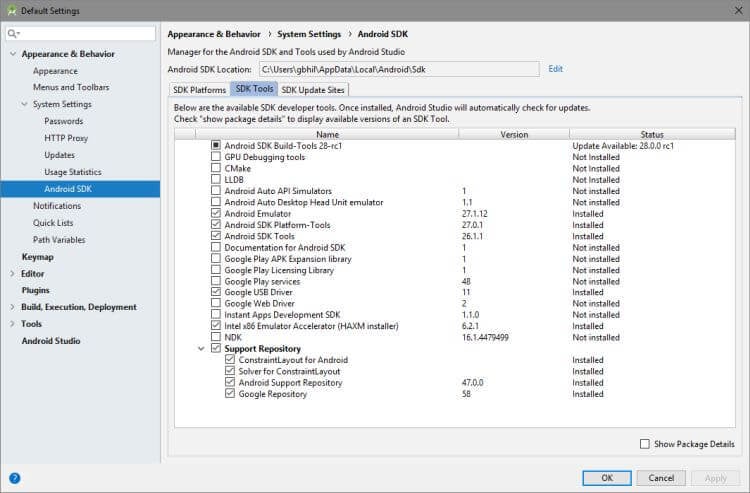
Выбираем «Android SDK Tools» и «Android SDK Platform-Tools», на Windows необходимо выбрать еще и «Google USB Driver». После этого подтвердите условия лицензионного соглашения, и начнется установка инструментов. В Windows они расположатся в папке «Windows\users\Имя пользователя\AppData\Local\Android», а на Linux и Mac в папке «.Android».
Ссылки
Теперь давайте создадим символическую ссылку на эти папки, чтобы можно было быстро запустить инструменты через командную строку.
В Windows переходим в «Этот компьютер → Свойства → Дополнительные параметры системы → Дополнительно → Переменные среды». В «Переменные среды для пользователя» находим строку «Path» и кликаем по ней 2 раза. Откроется окно, в нём нажимаем «Создать» и вставляем полный путь к инструментам через точку с запятой. Должно выглядеть примерно так «C:\Android\tools;C:\Android\platform-tools».
На Mac в домашней папке находим скрытый файл «.bash_profile» или просто «.profile». Открываем его командой «nano
/.profile» и добавляем путь до инструментов:
export PATH=»$HOME/Android/tools:$PATH»
export PATH=»$HOME/Android/platform-tools:$PATH»
Сохраняем файл комбинацией «CMD+X» и далее жмём «Y». На Linux процесс аналогичен, но нужно запускать файл .bashrc.
Вот и всё. Теперь команды Android SDK доступны через консоль. Вы сможете, например, устанавливать образы и вручную обновлять смартфон.
Источник
Установка Android SDK в Linux
Совсем недавно у меня был день рождения, и вот решил себе на юбилей сделать небольшой подарочек, купил LG GT540 Optimus с Операционной Системой Android на борту. В связи с этим в данном блоге решил осветить тему установки пакета для разработки — Android SDK — на Linux, в частности Ubuntu. В примере будет приведена установка для Ubuntu 10.10 (Maverick). Для этого нам понадобится пакет Java JDK, собственно, сам Android SDK, Eclipse и ADT. А теперь обо всем по порядку. Итак, приступим.
Установка Java JDK
Для установки вводим в консоли поочередно следующие команды:
В моем случае было скачано пакетов на
Установка Android SDK
Скачиваем последнюю версию SDK с официального сайта Android, и скачанный архив распаковываем, например, в домашнюю директорию.
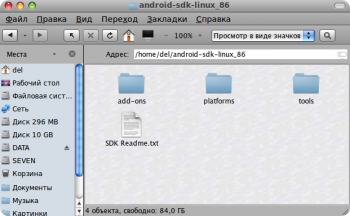
В консоли переходим в поддиректорию tools (в моем примере:
/android-sdk-linux_86/tools ) и запускаем скрипт:
Откроется окно Android SDK, в котором перейдя на вкладку «Available packages» отмечаем галочками нужные нам пакеты. Так как мой LG Optimus идет с Android 2.1 на борту, в примере я выбрал пакет SDK для соответствующей версии, а также документацию.
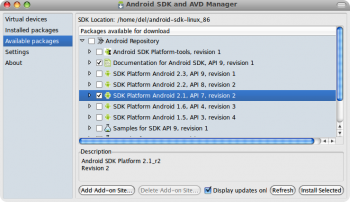
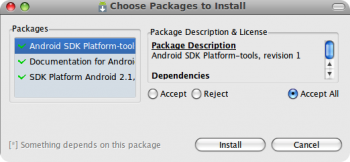
Жмем «Install Selected», а в появившемся окне выбираем «Accept All» и нажимаем «Install».
Пакеты весят немало, так что запаситесь терпением (особенно, если скорость вашего интернет-соединения не слишком большая). На предложение перезапуска ADB «Do you want to restart ADB now?» отвечаем «Yes». Ждем надписи об успешном перезапуске демона «ADB: * daemon started successfully *», жмем «Close». Закрываем окно Android SDK и переходим к установке Eclipse и ADT.
Установка Eclipse
Eclipse присутствует в репозиториях Ubuntu, поэтому сразу вводим в консоли:
Eclipse тоже довольно «увесистый», у меня попросил скачать пакетов на 191MБ.
Установка ADT
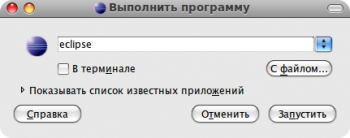
Жмем F2, запускаем Eclipse.
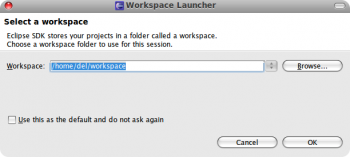
Выбираем директорию для рабочего пространства, жмем «ОК». Можно также отметить галочкой пункт «Use this as default and do not ask again», чтобы подобного выбора больше не предлагалось.
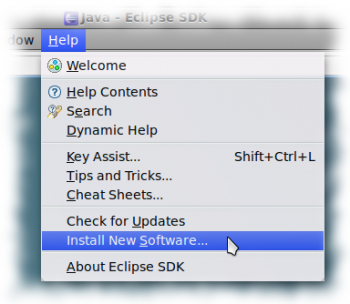
В меню выбираем: Help → Install New Software.
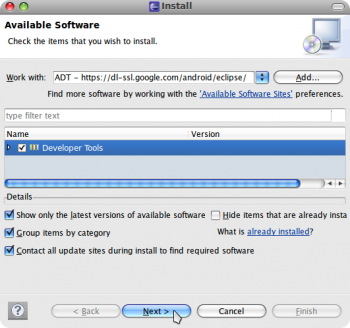
В появившемся окне выбираем «Add» и добавляем репозиторий ADT, указав следующие параметры:
Name: ADT.
Location: https:// dl-ssl.google.com/android/eclipse/
Жмем «ОК».
Ставим отметку напротив «Developer Tools» и нажимаем «Next».
В следующем окне снова нажимаем «Next», принимаем лицензионное соглашение (выбираем пункт «I accept the terms of the license agreements») и нажимаем «Finish».
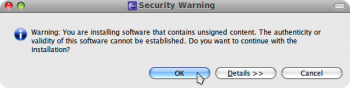
Если во время установки будет сообщено об установке неподписанного ПО, соглашаемся на продолжение.
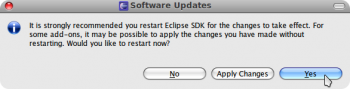
После установки предлагается перезапустить Eclipse, согласимся.
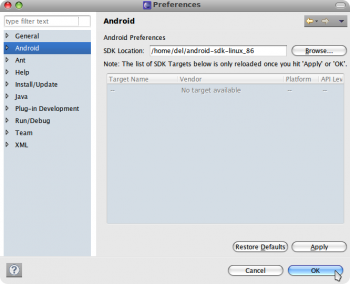
В меню выбираем: Window → Preferences. Переходим на вкладку «Android», нажимаем «Browse» и указываем путь до распакованного в самом начале Android SDK.
На этом установка Android SDK окончена, можно приступать к разработке 😉
Источник
How To Install Android SDK Tools On Ubuntu 20.04
It provides all the steps required to install Android SDK Tools on Ubuntu 20.04 LTS.
In this tutorial, we will discuss all the steps required to install Android SDK Tools, SDK Manager, and AVD Manager on the popular Linux distribution i.e. Ubuntu 20.04 with Java 16. This tutorial provides the steps to install Android SDK Tools on Ubuntu 20.04 LTS, though the steps should be the same for other versions of Ubuntu and Linux systems.
This post is useful for the developers using Android SDK Tools with other IDEs without installing Android Studio for the use cases including hybrid app development using Ionic. It also assumes that a valid JAVA_HOME environment variable exists pointing to the installation directory of Java. You may follow the Java installation tutorials written by us including How To Install Java 8 On Ubuntu, How To Install Java 16 On Ubuntu 20.04 LTS, and How To Install OpenJDK 16 On Ubuntu 20.04 LTS.
In case you are interested in developing Android applications using Android Studio, you can also follow the other tutorials written by us including How To Install Android SDK Tools On Windows, How To Install Android Studio On Windows, and How To Install Android Studio On Ubuntu 20.04.
You may also be required to execute the below-mentioned command in case you have set the options previously for Java 9 or Java 10.
Notes: The Ubuntu 18.04 LTS version of this tutorial is available at — How To Install Android SDK Tools On Ubuntu 18.04. You can continue this tutorial for Ubuntu 20.04 LTS.
Download SDK Tools
Open the download tab of Android Studio and scroll down to the Command line tools only section. This section shows various options to download the SDK tools as shown in Fig 1.
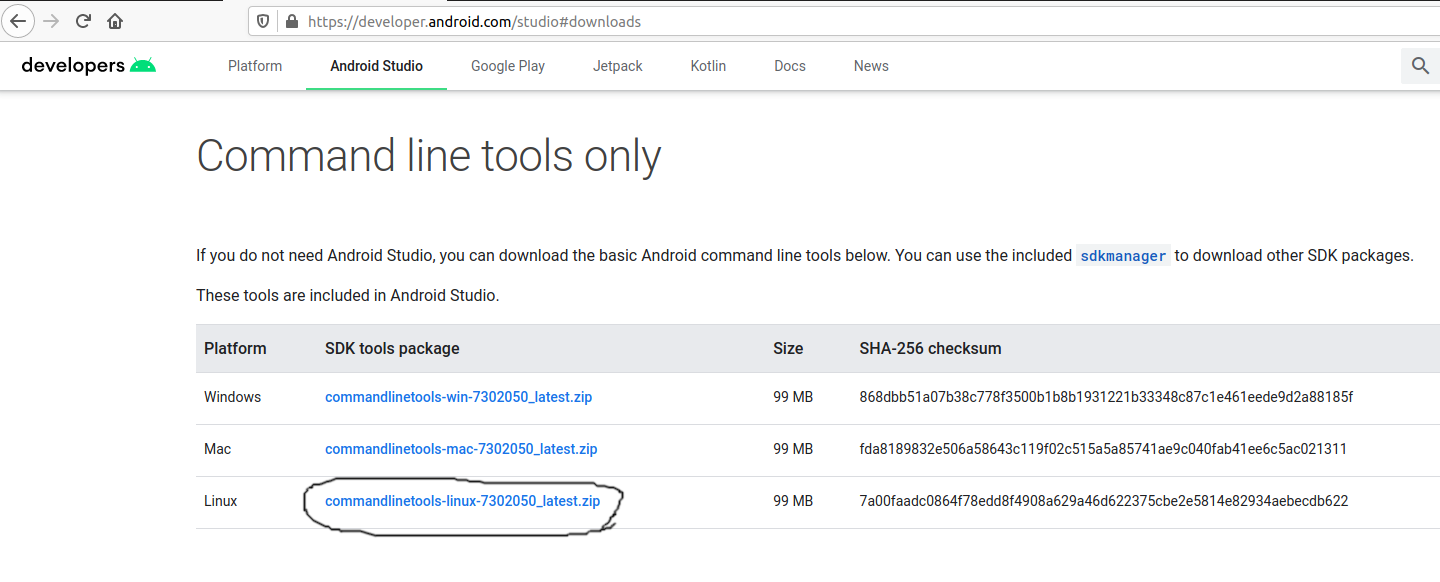
Click on the Download Link as highlighted in Fig 1. It will ask to accept the Terms and Conditions as shown in Fig 2.
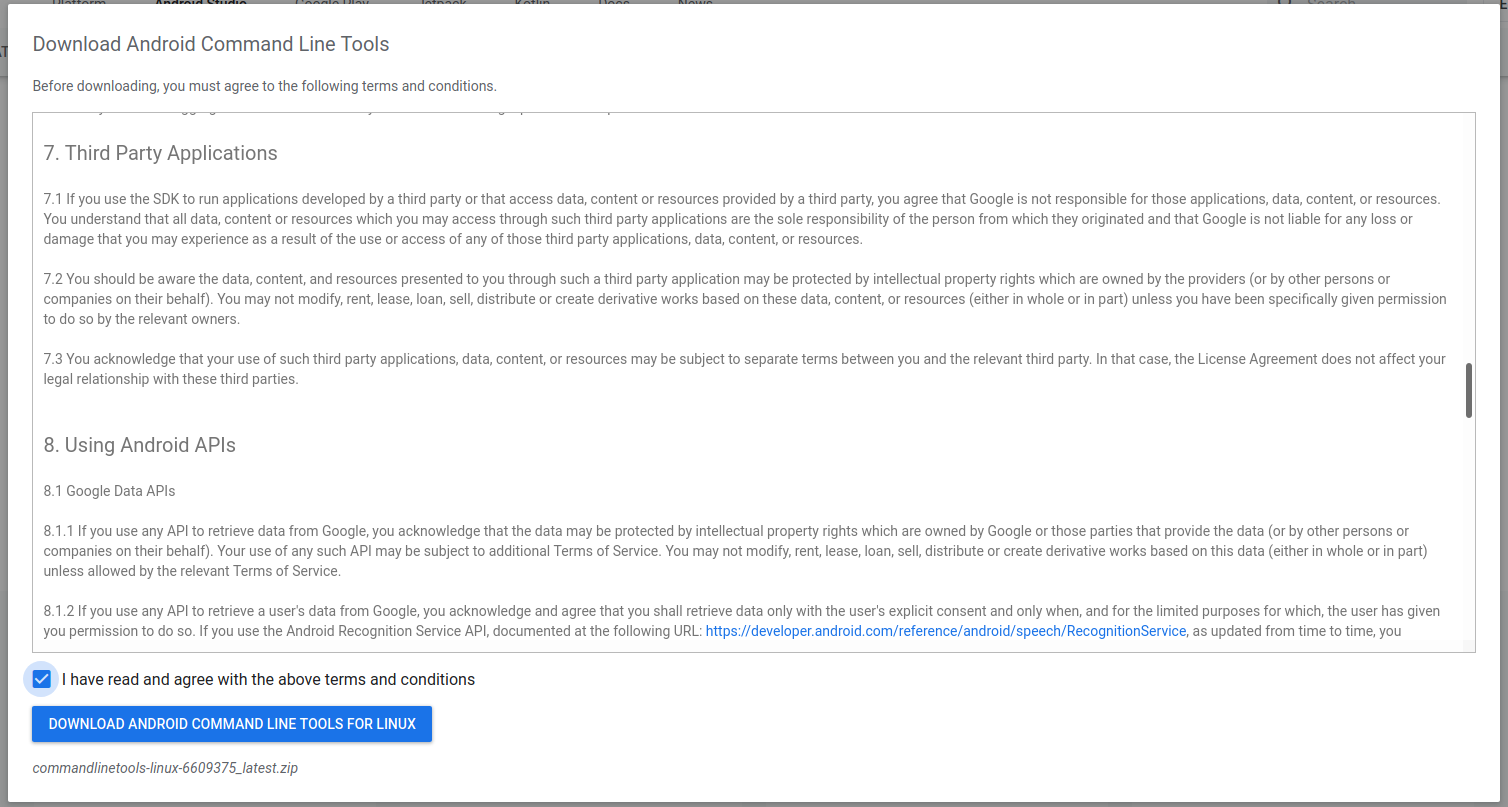
Go through the details, agree to the terms and conditions, and click the Download Button to start the download.
Install SDK Tools
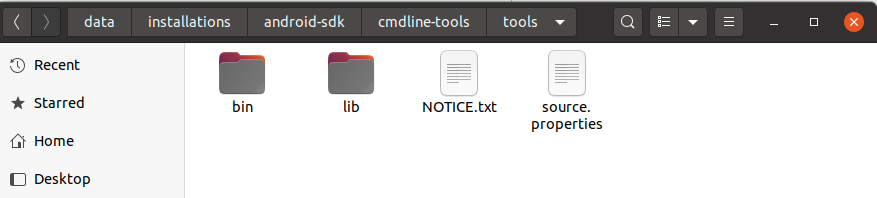
In this step, we will install the Android SDK Tools on Ubuntu. Create a directory having the name set to android-sdk and extract the content of the downloaded SDK Tools zip to this directory. Create another directory android-sdk/cmdline-tools to store the sdk-tools. Make sure that the tools directory is available directly within the android-sdk/cmdline-tools directory created by us.
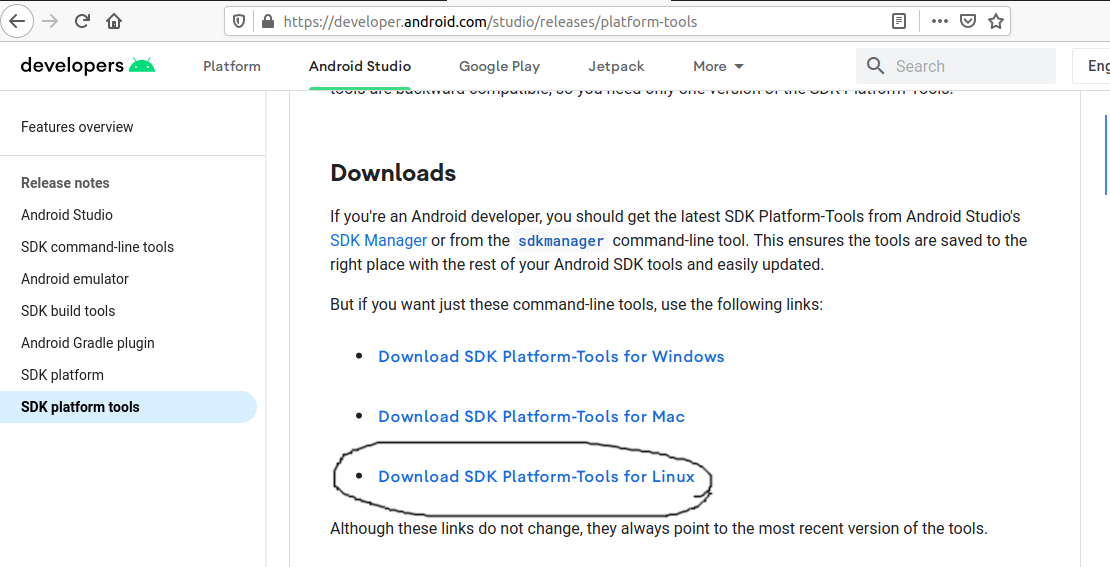
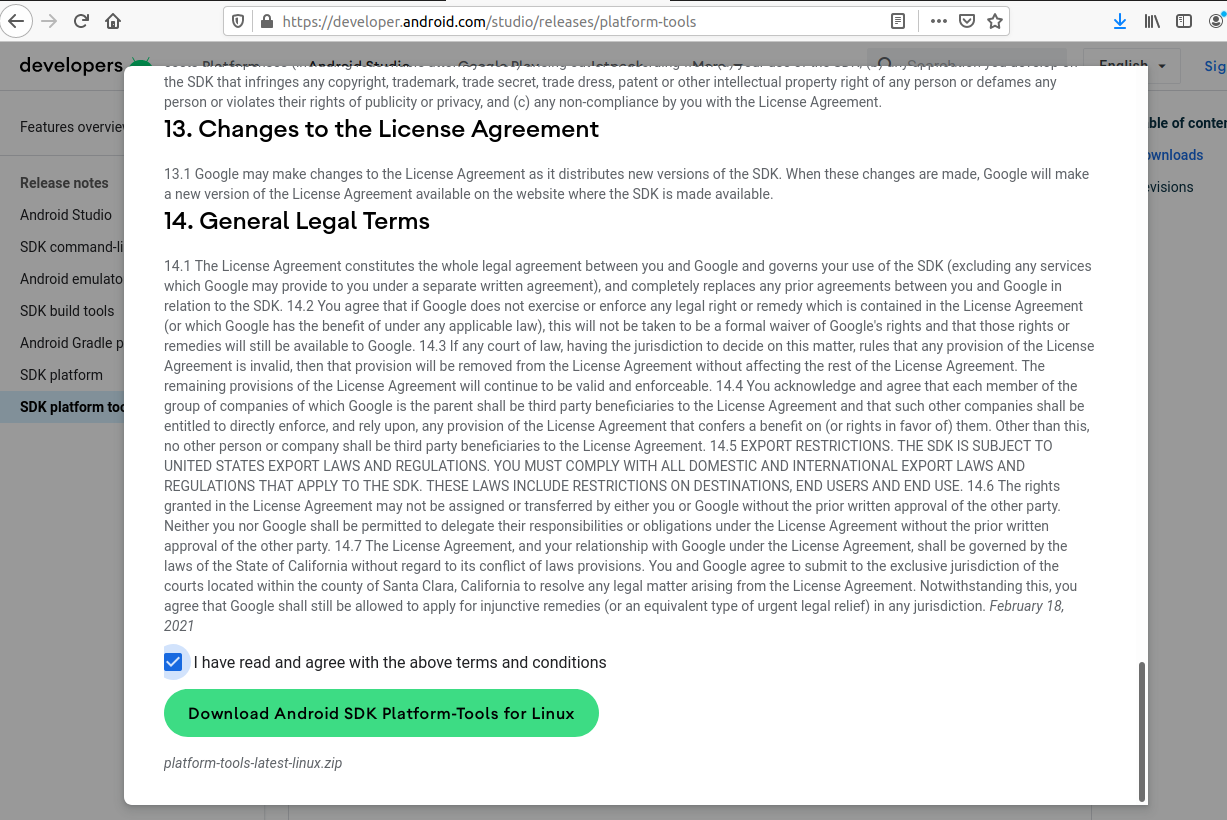
Download and Install Platform Tools
In this step, we will install the Android Platform Tools on Ubuntu. Follow the same steps similar to Android SDK Tools as shown in Fig 4, Fig 5, and Fig 6 to install Android Platform Tools using the download link.
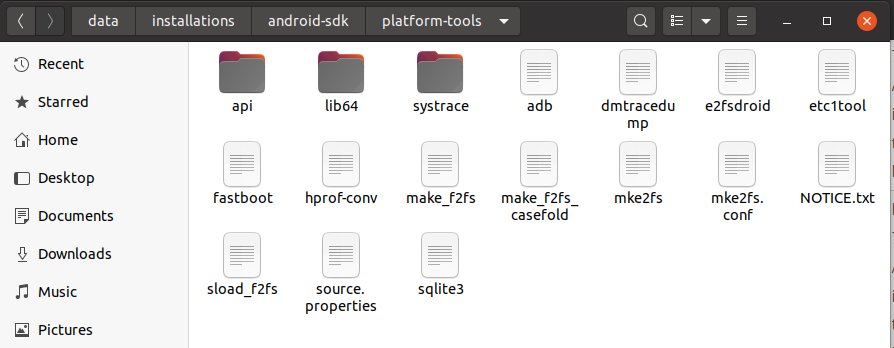
Make sure that the platform-tools content is available within the directory platform-tools. The directory structure should be similar to:
Configure Environment Variable
In this step, we will configure the environment variable to use the SDK tools installed by us. There are two ways to do it. In the first approach, we can update the .bashrc file of the user account. Another approach is to update /etc/profile file which works for all the accounts.
Approach A
Update .bashrc file of the user account.
Notes: Replace the android sdk path based on your installation directory.
Approach B
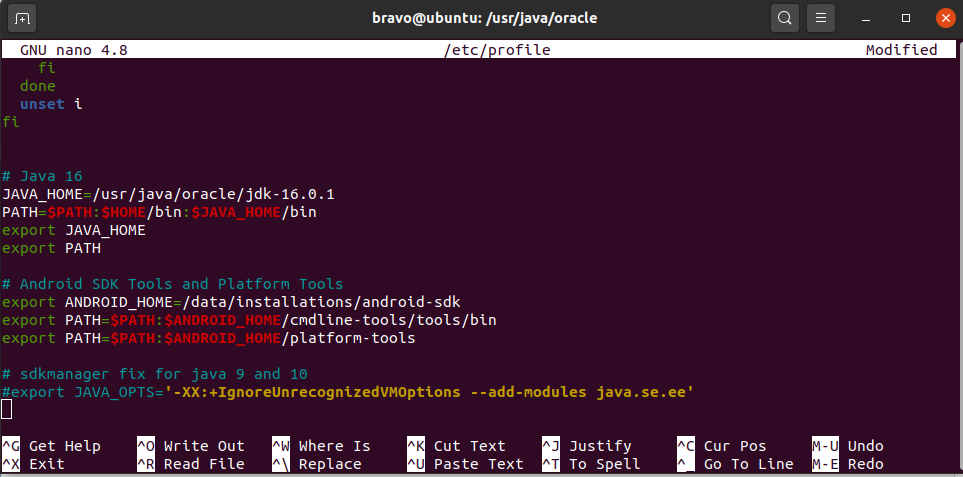
Update /etc/profile file.
Scroll down by pressing the Page Down button and add at the end of this file:
Make sure that you provide the correct path to the android-sdk directory.
Now press Ctrl + O and press Enter to write our change. Press Ctrl + X to exit the nano editor. The nano editor should look like Fig 7.
Notes: Approach B didn’t work for me.
Now test the Android SDK installed by us using the environment variables configured by us.
Using the SDK Manager
Update SDK Manager — Update the SDK manager using the below-mentioned command.
List — We can list the installed and available packages and images using the list command as shown below.
Install Platform — Use the below-mentioned command to install the Android 10 (API level 29) using the SDK manager.
It will ask to accept the terms and conditions. Enter y and hit Enter Key to accept the terms and conditions. This command creates the directories licenses and platforms within android-sdk and installs the package android-30 within the platforms directory having all the required files to run the emulator for Android 11.
If we again check the installed packages, the list command shows the installed options as shown below.
After installing the platforms, the directory structure should be:
Add System Image — We can add system image from available images shown by the list command using the SDK manager as shown below. We are adding the most recent default 64-bit system image.
Accept the License Agreement to complete the download. There are several projects which need Google Play Services. We need system images specific to Google Play Services as shown below.
Now again use the command list as shown below.
After installing the default system image, the directory structure should be:
Install Emulator — You might be required to install the emulator before creating the AVD using SDK Manager. The emulator gets installed while adding the system images in the previous steps.
Install Build Tools — Install the most recent build tool listed by the list command.
After installing the build tools, the directory structure should be:
Now again use the command list as shown below.
Using the Emulator and AVD Manager
Create AVD — Create the AVD using the system image downloaded in the previous step as shown below. Replace with actual name.
The above commands ask a bunch of questions to configure the AVD if we choose the custom hardware profile option. We have excluded the details of these options from this tutorial since these configuration details depend on the actual needs. After completing all the configurations, it creates the AVD using the name provided by us while configuring it.
List AVDs — Now go to the tools directory(only required in case you have omitted to add tools path to PATH while configuring environment variables) on the command line and check the installed platform as shown below.
It will list all the AVDs installed by us.
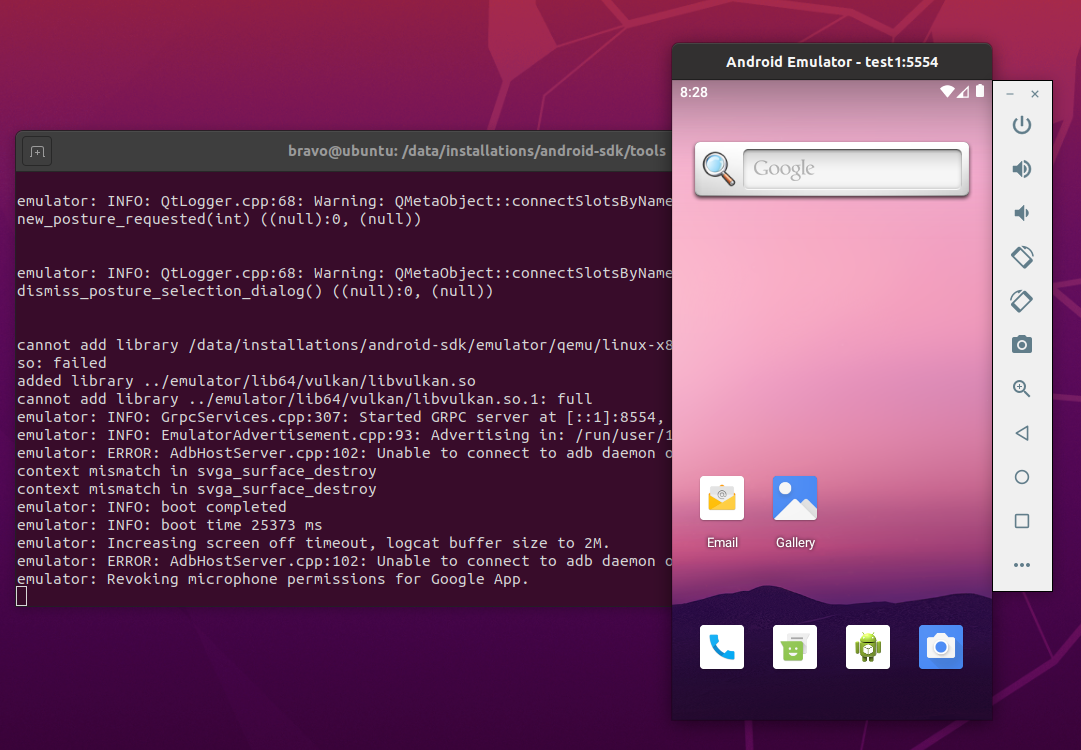
Launch AVD — We can launch the AVD using the emulator as shown below.
The emulator will take some time to completely launch the AVD. The final results should look similar to Fig 8.
Notes: I have used Ubuntu 20.04 LTS installed as VM using VMware Workstation Player, hence I have enabled the Virtualization for my Virtual Machine.
Delete Emulator — We can also delete an existing emulator as shown below.
Summary
This tutorial provided all the steps required to install Android SDK Tools and Android Platform Tools on Ubuntu 20.04 LTS. It also provided the steps required to launch the AVD using the Android Emulator.
Источник


